Mandates management is, along with transactions management, a core module of the service.
Available features are:
-
Search for a mandate;
-
View a mandate and the associations transactions, manage these transactions;
-
Edit a mandate;
-
Create a mandate;
-
Create transactions from a mandate;
-
Generate a custom form, i.e. a prefilled mandate.
These tasks will be described in the following subsections.
Reminder: Mandate Data
Every mandate created by the application consists of the following information:
-
Required data to create a mandate in SPS:
-
Unique Mandate Reference (UMR);
-
Mandate scheme (Core or B2B);
-
Mandate type (migrated, paper, e-mandate);
-
SEPA Creditor Identifier (SCI).
-
-
Required date for an active mandate:
-
Sequence type: recurring or one-off;
-
Signature date;
-
Place of signature;
-
Creditor company name;
-
Creditor’s IBAN;
-
Creditor’s BIC;
-
Debtor name;
-
Debtor’s IBAN;
-
Debtor’s BIC.
-
-
Optional Data:
-
Underlying contract identifier;
-
Contract description;
-
Unique Internal Reference (UIR, see below);
-
Creditor’s street address;
-
Creditor’s ZIP code and city;
-
Creditor’s country;
-
Debtor’s street address;
-
Debtor’s country;
-
Debtor reference;
-
Debtor’s email;
-
Debtor’s phone number;
-
Debtor’s fax number;
-
Name of the third party the debtor is carrying out payments for;
-
Third party debtor’s identifier code;
-
Name of the third party creditor;
-
Third party creditor’s identifier code.
-
-
Optional data related to the mandate:
In addition, SPS allows the creditors to link a Unique Internal Reference (UIR) to each mandate; this UIR is used in the creditor’s information system. It allows the creditor to handle both the legacy direct debit requests and the SEPA-compliant ones without a major information system overhaul. If only the UIR is known, SPS will generate an UMR from it. If the creditor only knows the UMR, the UIR will be set to mirror the UMR.
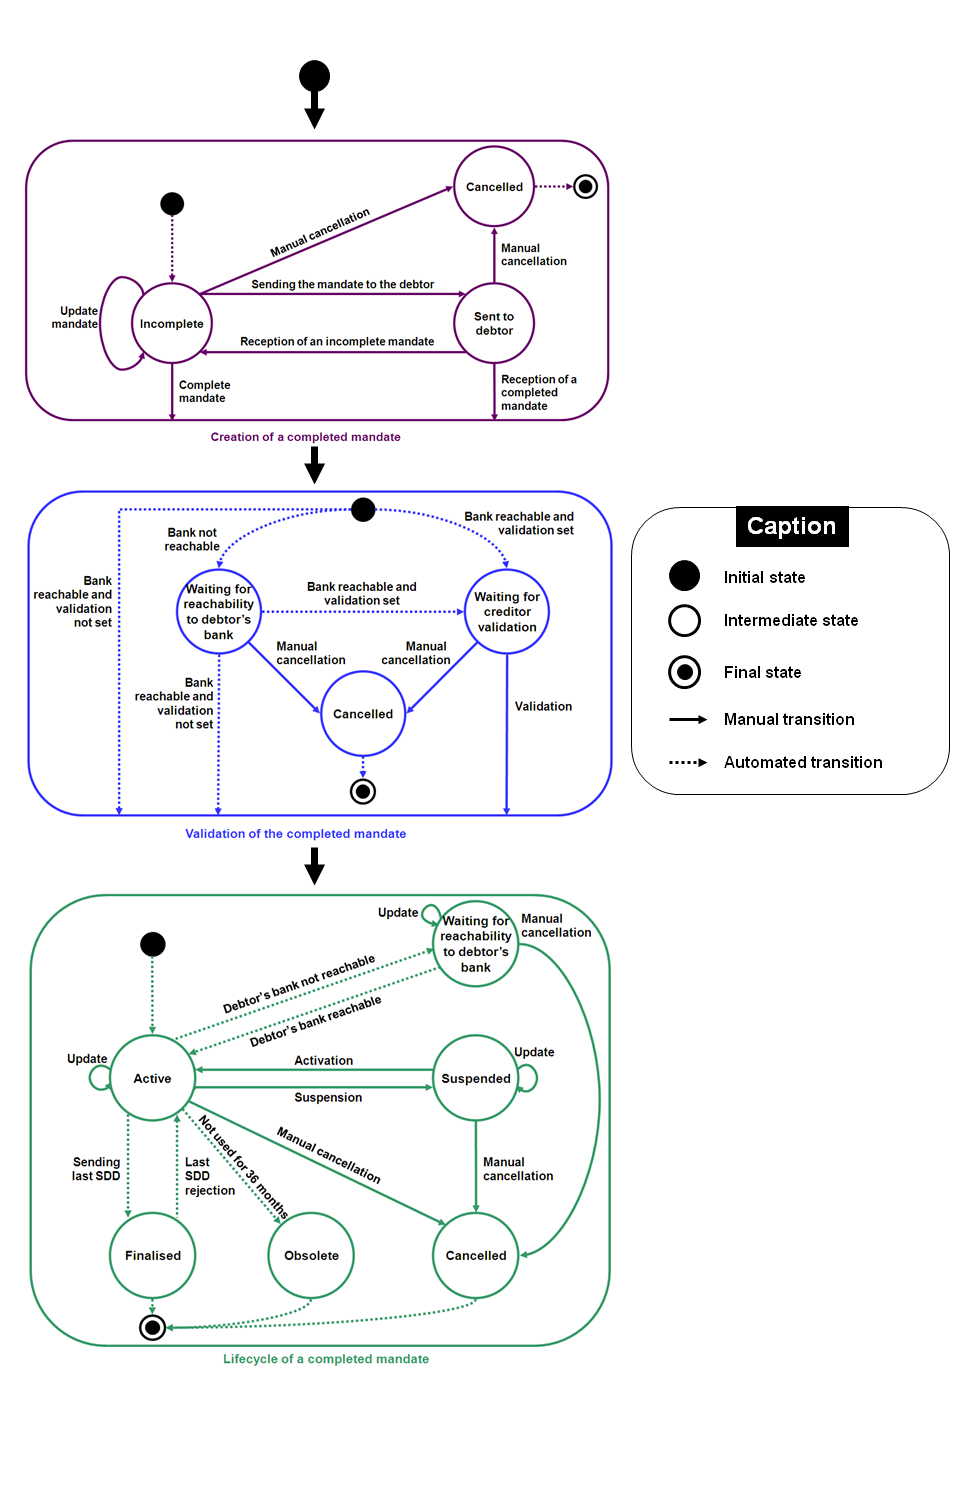
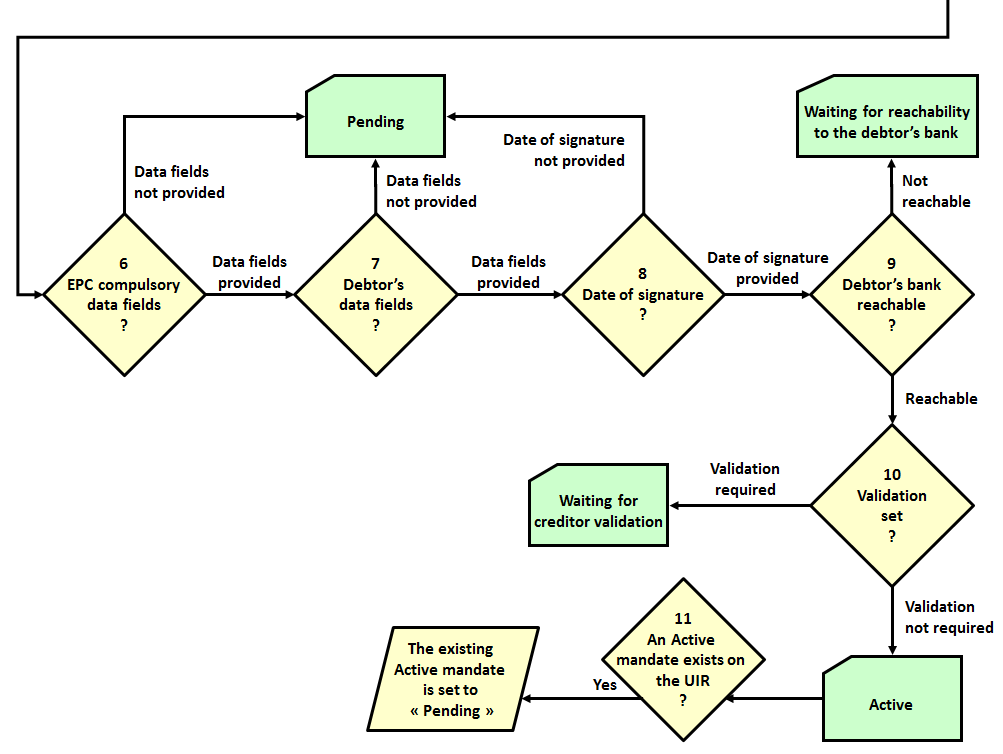
Reminder: the Mandate Life Cycle
The life cycle of a mandate is as follows:
Searching for a Mandate
Searching for a mandate in done on the page “Search”: Home > Creditor > Mandates Management: Mandate Search.
This page allows the user to search for mandates according to a defined list of criteria. It displays the results as a table. Viewing and editing the mandates is possible if the user as sufficient rights.
It is possible to make a like search (%xxx) with the following criteria: UMR, Debtor name and Creditor name, Debtor External Id, Debtor BIC/IBAN
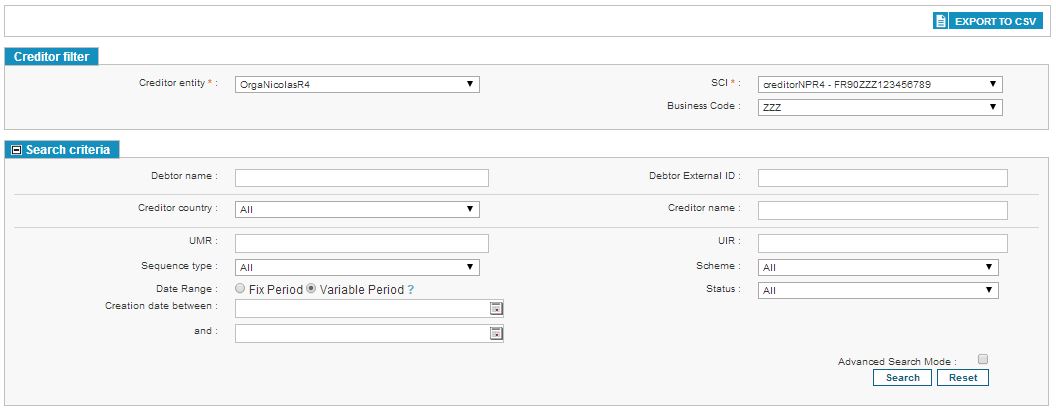
Selecting the Search Criteria
A first block named “Creditor filter” allows the user to select a creditor entity and an SCI account (see Choosing a Creditor Entity and an SCI).
A second block,“Search criteria” is used to filter the search results. It is divided into three parts that are:
-
The debtor;
-
The creditor;
-
The mandate.
If the user clicks the [Search] button without changing the default criteria, then all the mandates available to the user will be displayed in the search table at the bottom of the screen.
As described in the second chapter, if the user uses custom search criteria and launches a new search, the results table will be updated and the new search criteria will be displayed.
The “Search criteria” block can also be hidden (see Hiding the Search Criteria).
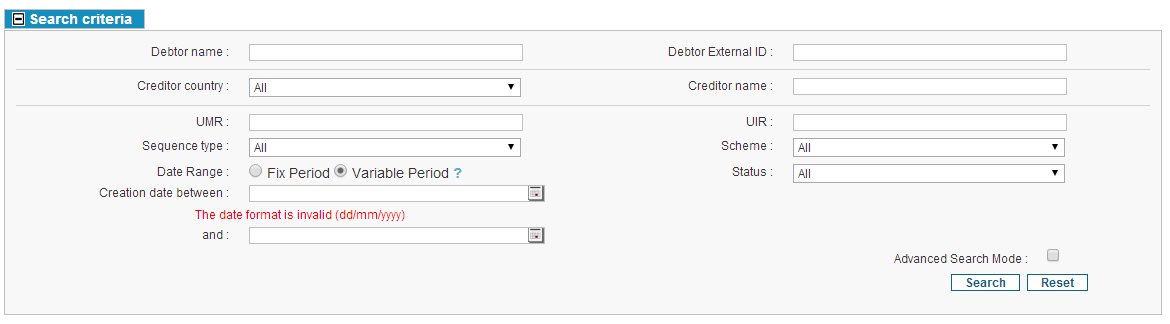
The Creation date must be in format dd/mm/yyyy. If user provides the wrong input for the creation date then error “The date format is invalid (dd/mm/yyyy)” Is displayed.
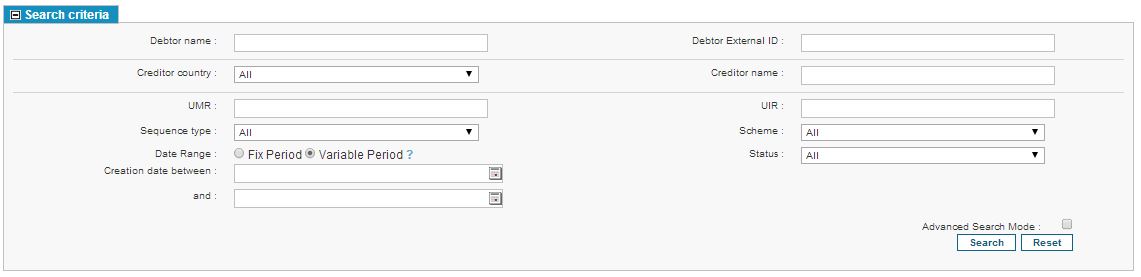
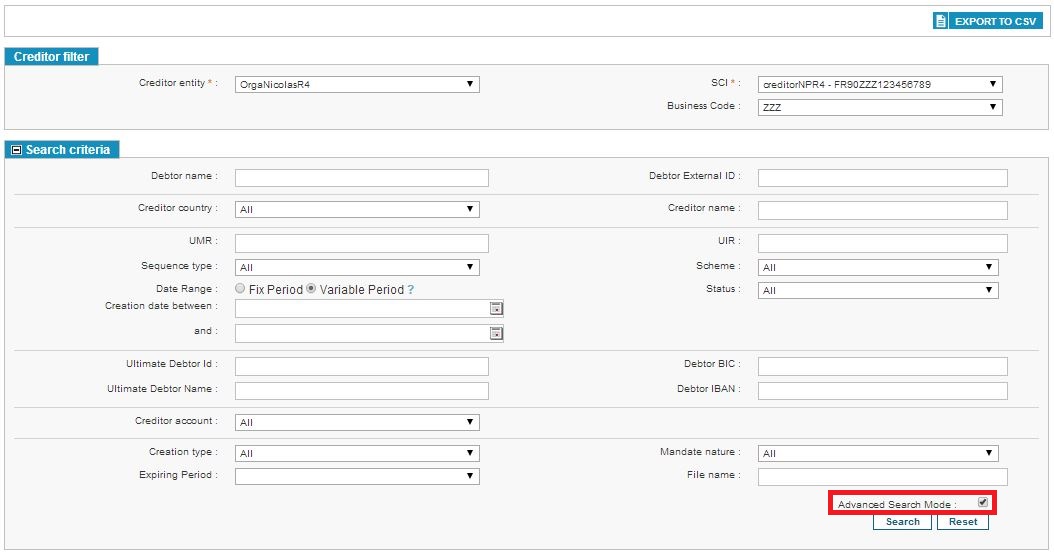
Advanced Search Option
By clicking the advanced search option check box, several new options are dynamically displayed.
If the user filled an advanced search field and unchecked the advanced search option, when he clicks on [submit], the search do not take account of the advanced search field.
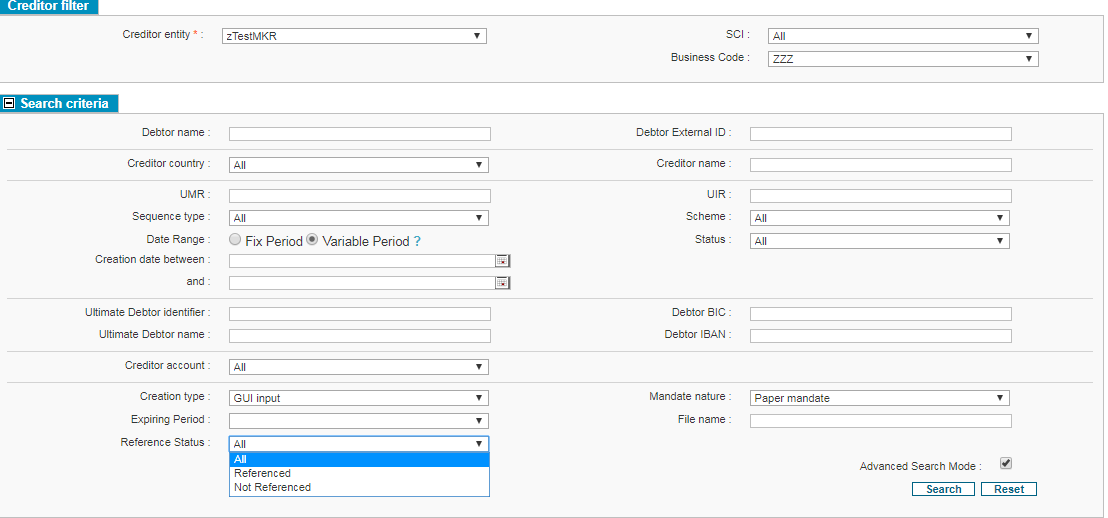
Advanced Search Option when entity has payment guaranty option active
When the merchant with Payment Guaranty optionactivated, click on ‘Advanced Search Mode’ option, new search field is available shown as “Reference Status”.
Searching Using a Specific Criterion
Example: the user launches a search on a specific UMR value and hits [Search]. Results appear on the “Results” block at the bottom of the page.
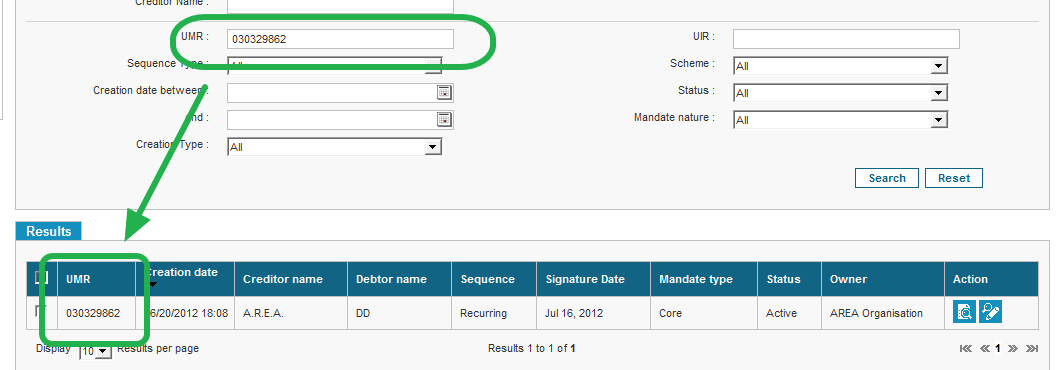
Hitting [Reset] launches a new search and deletes all previous search criteria. The number of results is limited to 1000.
Searching using the “UIR”
When a search is done on mandates providing an UIR, the results are:
-
If there is no Mandate for this UIR: no results
-
If there is only one Mandate for this UIR: return the only one
-
If there are several Mandates for this UIR:
-
If there is an Active Mandate (always at maximum one will exists): return the Active one
-
If there is only one Pending Mandate: return the Pending
-
In other cases: no results
-
As for the UMR the search finds all mandates «starting» with the entered value.
Example: for an UIR/UMR equals to MANDATE-REFERENCE-0001
-
Searching by "MANDATE" will find the mandate.
-
Searching by "REFERENCE" will not find the mandate.
Date Range option
Date range option allows the user to choose between a variable period where the user puts himself the date range for the research and a fix period.
“Variable Period” option is selected by default.


When selecting the “Fix Period” radio button, the default selected option in the drop list is “Last 24 hours”
Nine filters are available:
-
Last 24 Hours
-
Today
-
Yesterday
-
Current Week
-
Last Week
-
Last 7 days
-
Current Month
-
Last Month
-
Last 31 days
These options are mutually exclusive. This means that the user can either provide a range of dates by entering the dates manually, or choose one of the pre-defined filters; but not both.
Furthermore, the pre-defined filters are displayed in a drop list. This means that the user can only select one of the 9 filters for a particular search.
The date range option is also use in following search pages:
-
Transaction search page.
-
R-Transactions search page
-
Collections search page
-
Collection files search page
-
Erroneous transactions search page
-
Files search page
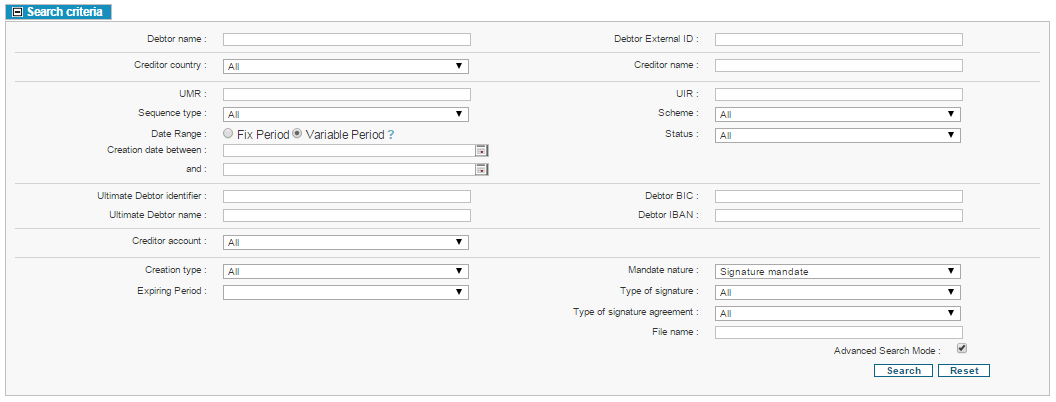
Mandate Nature
In advanced search criteria the field “Mandate nature” has 5 possible values:
-
E-mandate
-
MyBank E-mandate
-
IDEAL E-mandate
-
Migrated mandate
-
Paper mandate
By selecting “Signature mandate” two additional search criteria fields are dynamically displayed:
-
Type of signature: One Time Usage, Organization
-
Type of signature agreement: OTP SMS, OTP EMAIL, 3DS Secure
Searching using “Reference Status”
The mandates using Reference Status “All”, “Referenced” and “Not Referenced” can be searched. The detail for each type is described below.
-
All: All the mandates which are secured or not secured will be shown on the list of records.
-
Referenced: All the mandates which are secured (having Consumer reference) will be shown in the list of records.
-
Not Referenced: All the mandates which are not secured and do not have Consumer reference will be shown in the list of records.
These search parameters can be used in combination with other search criteria. The matched results will be shown.
Possible Actions
Several actions can be completed after the mandate search returned at least one result.
Viewing a Mandate
The user can view a mandate’s details from the results page. In order to do so, he must click on the [Mandate Details] button.

The user is redirected to another page described in Viewing a Mandate, Associated Actions.
Modifying a Mandate
The user can also modify a mandate. The [Edit Mandate] button is at the end of the row.

The user is redirected to a page described in Editing a Mandate.
Activating or Suspending a Mandate
These actions can be executed from the search page (see Activating/Suspending/Revoking/Deleting a Mandate). Several mandates can be activated or suspended at once.
Selecting Mandates in the Search Results
Depending on user rights, several actions are possible for a selection of mandates: advanced modifications, validation, rejection of validation and suspension. The user can select:
-
A mandate;
-
Several mandates on the page;
-
All mandates on the page;
-
Every found mandate if several results pages are available.
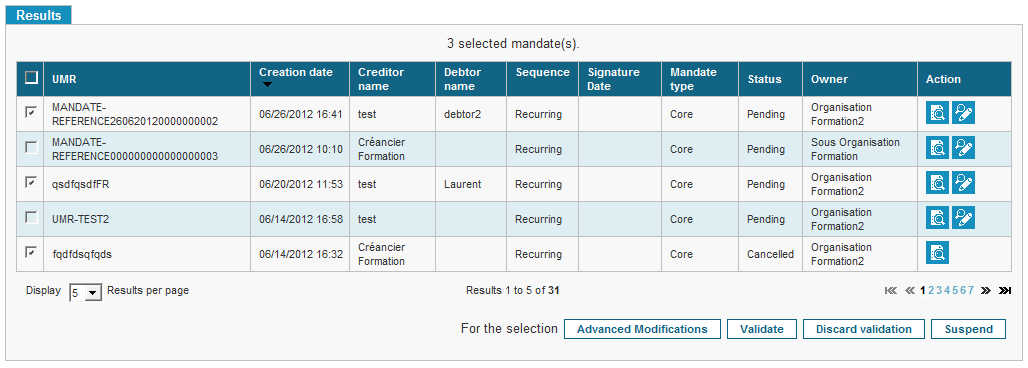
If the user chooses to select all mandates on the page by clicking the main tick box at the top of the table, the option to select all search results on all pages becomes available.
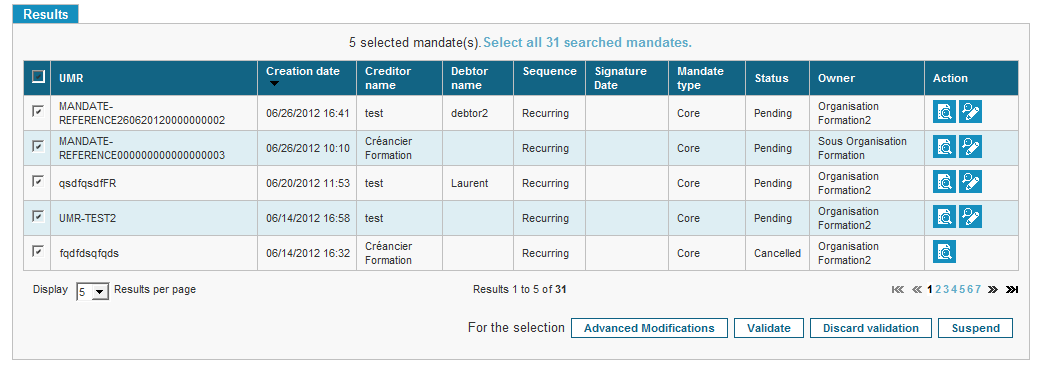
By clicking on “Select all 31 mandates”, all mandates found are selected and the user is informed by a message on top of the results table.
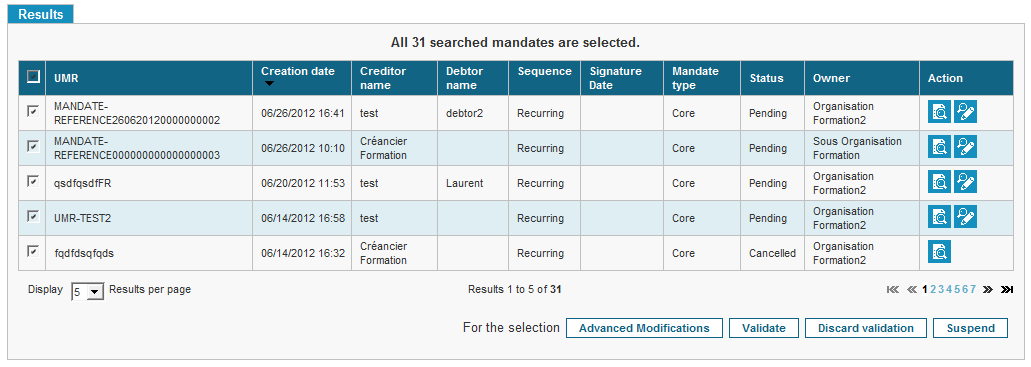
All mandates are now selected.
Exporting Results
The user can export search results in a CSV file by hitting [Export to CSV] at the top of the page.
The maximum number of mandates exported in the file is limited to 100001.
But if the number of mandates to export is more than 100001, then an error message is displayed.

If the user clicks on [EXPORT TO CSV] button again while previous export is still in process then error message is displayed.

Viewing a Mandate, Associated Actions
Clicking the [Mandates details] button redirects to the “Display” page: Home > Creditor > Mandates Management: Display.
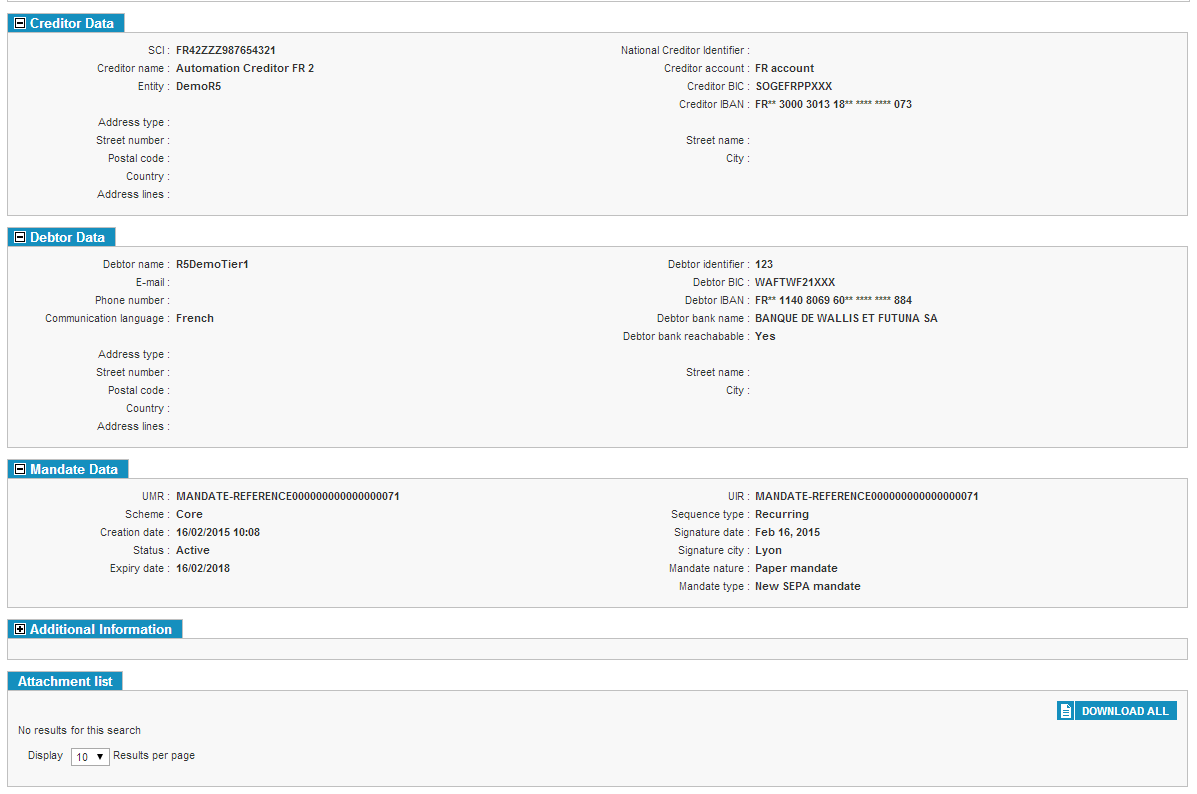
Are displayed on this page the information related to the mandate, the modification history, links to the payment schedule and the associated SDDs. Additional actions are also available: activating, suspending, revoking a mandate, editing and sending to the debtor.
Viewing a Mandate’s Details
Mandate details are displayed within five blocks:
- Creditor data:

- Debtor data:
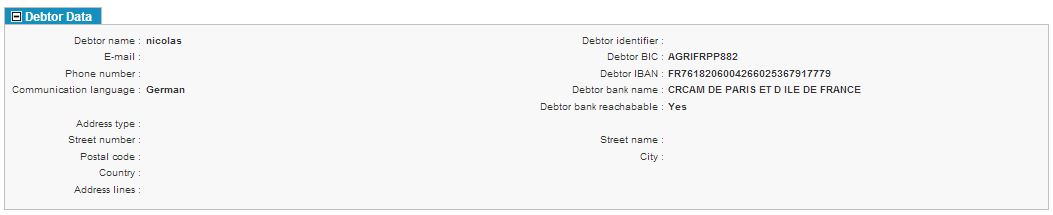
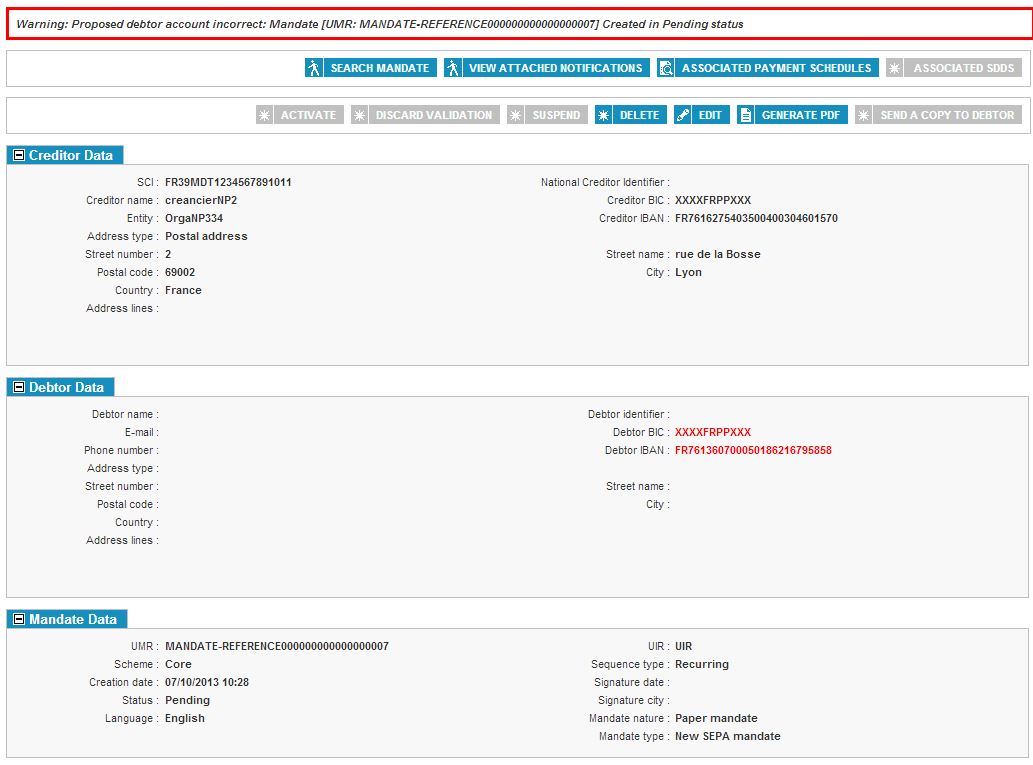
If the Debtor account is wrong, the BIC and IBAN are displayed in RED.
- Mandate data:

This block also displays the expiry date of mandate. The Expiry date of mandate is calculated by adding 36 months to the due date of the last SDD issued.
For mandate with no SDDs, the expiry date field is not displayed in the Mandate data block.
- Additional information:

Please note that “Next Sequence Type” indicates the sequence type of the next SDD to be generated. “Debtor bank reachability” specifies if the debtor’s bank can be reached for that type of mandate.
“Amended data” field is visible only on details page. The field is not editable. The possible values for the field are :
-
UMR
-
Creditor Account
-
Creditor Name
-
Debtor Account
-
Debtor BIC
-
Debtor IBAN
-
Signature details:
This block is displayed only for mandates with a mandate nature equals to “signature mandate”.

- Life Cycle
The last block displays the mandate life cycle (see Life Cycle).

-
Planned Modification
This block displays the planned modification on the mandate.

Possible Actions on a Mandate
While viewing the details of a mandate, several actions can be executed and will be described in the following subsections.

Returning to the Search Page
The [Back to Search] button sends the user back to the mandate search page.

Displaying the Associated Schedules
The [Associated Payment Schedules] displays the schedule associated with the mandate. Managing the mandates is explained in

igure 125: Mandate display page
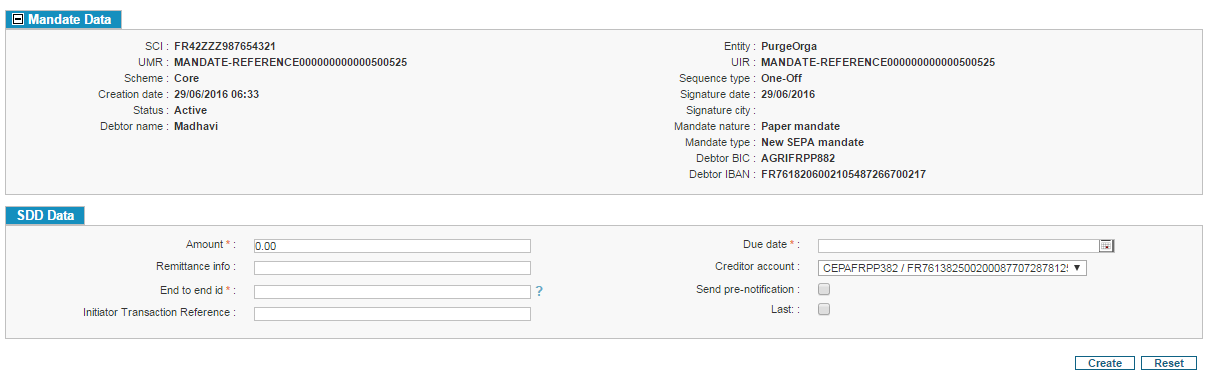
Figure 126: SDD creation page

Figure 127: Last checkbox appears when "RCUR only management" is not activated

Figure 128: Last checkbox disappears once "RCUR only management" is activated
NEW Creating a SDD from SDD creation formA SDD can be created using WEB GUI, only if the mandate on which SDD is created is in “Active” status. To create a SDD the user must reach the Mandate view page.
Figure 125: Mandate display page From this page, the user clicks the [Create SDD] to begin the SDD creation process Figure 126: SDD creation page The user can fill following data:The SDD amountThe remittance informationEnd to End IdThe due dateThe creditor’s bank accountSend pre-notificationLast : To specify if this SDD is last SDD on the current mandateThe Initiator Transaction ReferenceIf the “RCUR only management” checkbox is not activated for Organization, then the checkbox “Last” appears on SDD creation page.
Figure 127: Last checkbox appears when "RCUR only management" is not activated Once the “RCUR only management” checkbox is activated for Organization, then the checkbox “Last” disappears from SDD creation page.
Figure 128: Last checkbox disappears once "RCUR only management" is activated Creating an SDD from the Payment Schedule.

Displaying the Attached Notifications
The [VIEW ATTACHED NOTIFICATIONS] displays the search page "Sent objects list" with the pre-filled form.

Displaying the Associated SDDs
The [Associated SDD] button allows the user to access the list of associated SDDs. See Viewing SDDs and R-Transactions from the “Mandat.
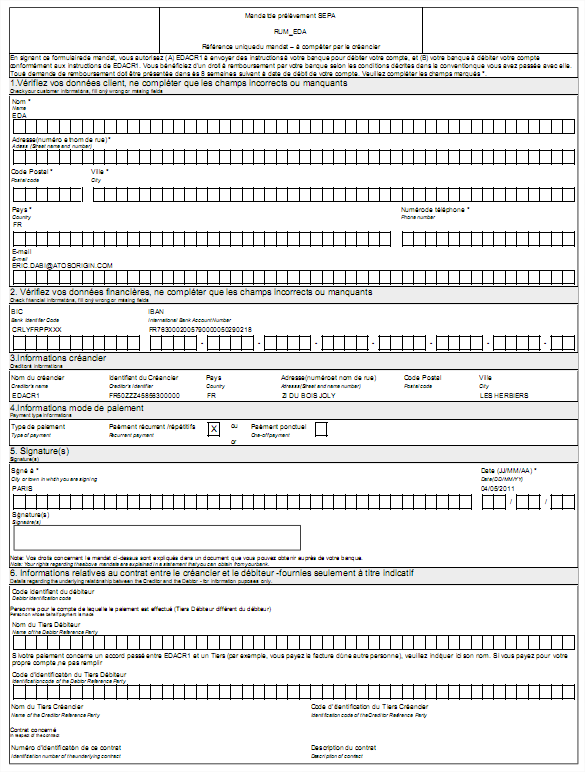
Generating a PDF
A user can request a PDF to be created from the selected mandate.
Basic information regarding the mandate, the debtor’s financial data, the creditor’s information and the payment mode are automatically filled by SPS. The debtor will only have to fill in his personal information before signing the mandate.

The generated PDF is created following a predefined pattern.
Sending a Copy of the PDF to the Debtor
The user can also send an email copy of the PDF to the debtor. Please note that the message body must be configured (see Notification Preferences).

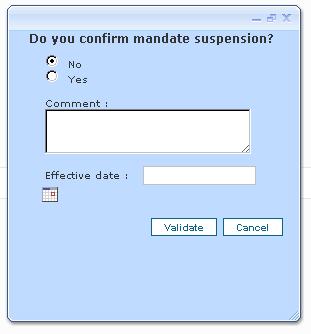
Mandate Actions: Activate/Suspend
A mandate may be suspended manually by the user when the debtor asks it. By clicking on [SUSPEND] none SDD can be created from this mandate. The button [Create SDD] will be grayed out and the button [ACTIVATE] available. To reactivate it just click the button and the creation of SDD will be allowed again.
In case the validation actions on mandates are active for the suspension and the activation parameters of the creditor organization, the process of double-validation explained in part 4.4.2.9 will be triggered.

Once one of this buttons was clicked, a confirmation window appears and allows the user to specify the reason for his action by a comment, and specify the date desired for the action. If no date is specified, the action is immediate.
If the action is successful, a red message is displayed on the top of the page.
If the action failed, a red message explaining the reason is displayed on the top of the page
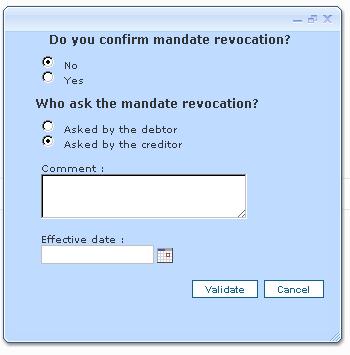
Mandate Actions: Revoke / Delete
A mandate may be deleted if it has never been any real legal value. The cancellation of the mandate will be the same in both cases: it will switch to "Deleted" or "Revoked" status, cannot be changed and none "SDD" longer be issued.
In case the validation actions on mandates is active for the revocation and suspension settings creditor organization, the process of double-validation explained in part 4.4.2.9 will be triggered.

Once one of this buttons clicked, a confirmation window appears and allows the user to put a comment, the applicant for cancellation (creditor or debtor), and specify the date desired for the action. If no date is specified, the action is immediate.
If the action is successful, a red message is displayed on the top of the page.
If the action failed, a red message explaining the reason is displayed on the top of the page
Mandate Actions: Validate / Reject the validation
When validation rules mandates actions are enabled for the GUI, double-validation is required for each action concerned.
It means that once the action is requested, a different user who initiated it must confirm his achievement by clicking the button [VALIDATE] or reject by clicking [REJECT VALIDATION]. The user who initiated the action can also cancel its request at any time by clicking [REJECT VALIDATION].
Once you have clicked the button [OK], a confirmation window is displayed summarizing the requested action with the comments and dates entered. Then the validator can confirm or not the action and a red message related to his choice will be displayed on the top of the page.
Editing the Mandate
The mandate can be modified by clicking [Edit Mandate] (see Editing a Mandate).

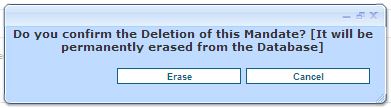
Complete deletion of a Mandate
If the user has the profile “Erase a mandate”, a [ERASE] button is displayed on the Mandate display page which allows to completely erasing the mandate from the SPS database.
This button is only being activated if it meets the Minimum Requirements for the Mandate Erase Operation. (see the General Functional Specifications)


A popup confirmation will be displayed when the user clicks on Erase button. If the user confirms by clicking on Erase, then the mandate will be permanently erased and the user will be redirected to the Search Mandate Page.
Not: An Erased Mandate will never appear in Event Reports. If an Organization wishes to keep a trace of the erased mandate, it should first Delete the Mandate, generate an event report and then Erase it.
An entry will appear in the Operator Log in SPS for every Mandate Erase Operation, irrespective of it being through GUI.

The creation log of the erased mandate is still present, but the link to visualize the mandate is removed.
Activating/Suspending/Revoking/Deleting a Mandate
The user can activate or suspend a mandate from one of two pages:
-
The Mandate Search page (see Searching for a Mandate). Editing several mandates at once is possible from this page;
-
The Mandate Details page (see Viewing a Mandate, Associated Actions).
A mandate can only be revoked/deleted from the Mandate Details page.
A reminder is first performed on these status for a mandate.
Reminder: Mandate Statuses
-
Activated: A user can activate a mandate that has been previously suspended. The mandate’s status is then set to “Active”. Comments can be added to explain the activation reasons. Activating a mandate is an immediate action. If SDDs flagged with a “Pending” status are associated to the mandate, their status is also updated. When a mandate is active, the debtor’s account can be charged accordingly.
-
Suspended: A user can suspend an active mandate. The status is set to “Suspended”. Comments can be added to explain the suspension reasons. If SDDs with a “Created” status are linked to the mandate, their status is also updated. As long as the mandate is suspended, no direct debit can be charged from the mandate. Should debit requests be received, they will be set on hold until the creditor activates the mandate.
-
Revoked: A user can revoke an active or suspended mandate, or remove a mandate with no legal value (unsigned). The revocation date can be set from the confirmation window; by default it is the current day’s date. The revocation date must be the current day’ date or a future day: choosing a date that has passed will result in an error. If no date is given, the action is immediate. Once the mandate has been revoked, its status is frozen until the revocation day.
Activating/Suspending a Mandate from the Search Page
From the mandate search page (see Searching for a Mandate), the user can choose mandates to edit by ticking the boxes on the left of the rows.
Once the mandates are selected, the user can either hit [Validate] or [Suspend] to change the mandate status.
Example: the user chooses a suspended mandate (seen in green in the screenshot), selects it by clicking the check box on the left, and sets it to “Active” by hitting [Validate] (refer to the red box in the image).
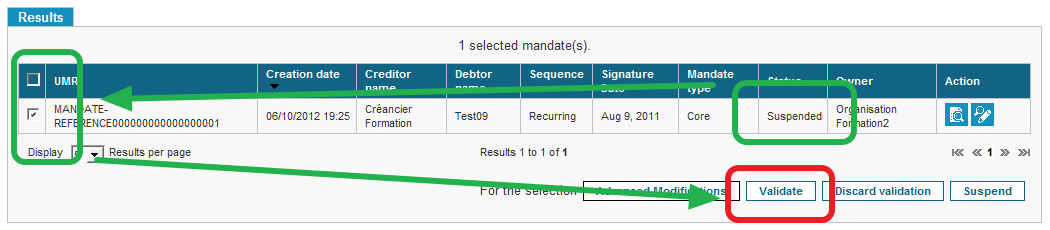
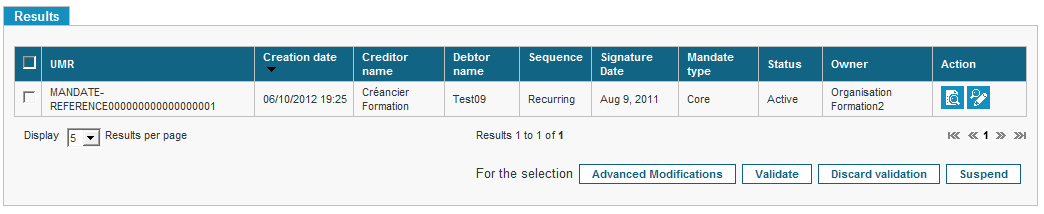
The page is refreshed and the mandate status has been updated.
Activating/Suspending/Revoking a Mandate from the Mandate Details Page
From the Mandate Details page (see Viewing a Mandate’s Details), the user can, depending on the current mandate status, click one of the three actions buttons.


Once the button has been clicked on, a confirmation window will appear (see Confirmation Window).
Depending on the mandate’s current status, some buttons can be disabled. They will appear grayed out and are unclickable.
Example: If a mandate was suspended, the [Suspend] button will be disabled while the [Activate] and [Revoke] button will be enabled.

Creating a Mandate
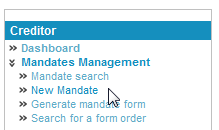
Creating a mandate is done through the “New” page: Home > Creditor > Mandates Management: New Mandate.
This page allows the user to create a new mandate. The creation process can vary depending on the collection type. The following subsections will explain the creation process in details. Please note that the required data to create a mandate is reviewed in Reminder: Mandate Data.
The legend at the end of the page gives the meaning of the single asterisk and the double asterisks that can be displayed:
*: Fields mandatory
**: Fields required for activation
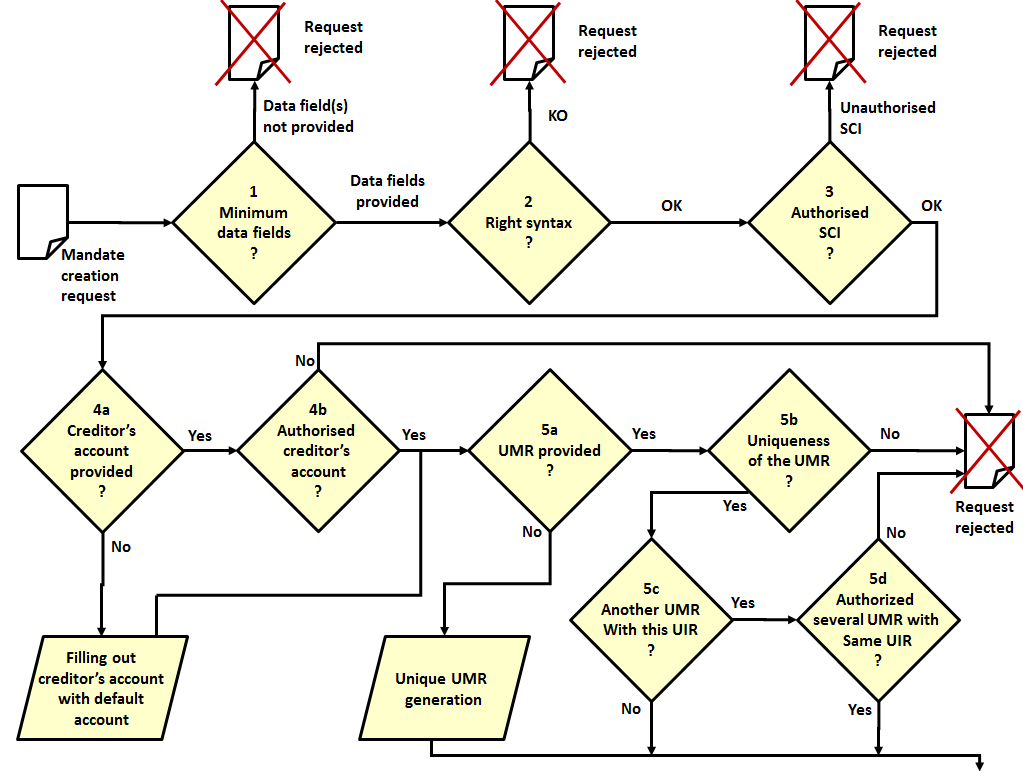
Reminder: Mandate Creation Workflow
The mandate creation process is detailed below:
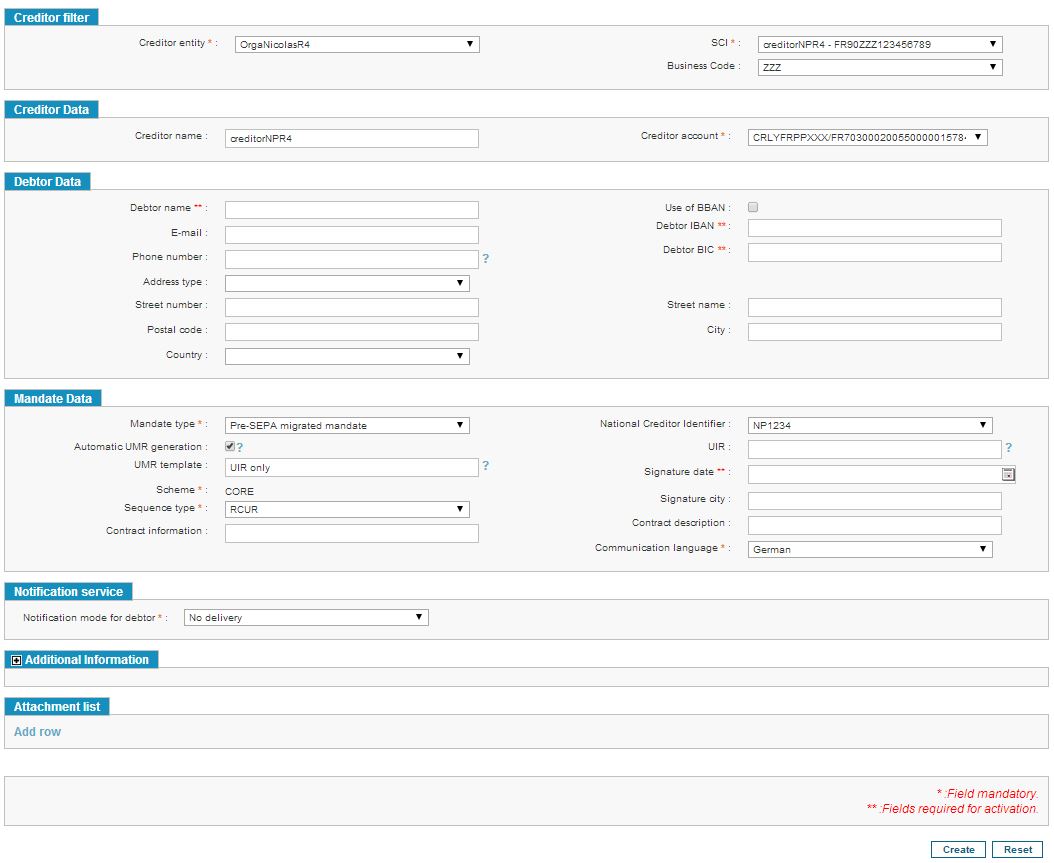
Creating a Mandate: Mandate Creation Form
The creation page is split into several parts that will help the user in creating a new mandate:
-
The “Creditor filter” block:
This block allows the user to select a creditor entity, the SCI account and the Business Code (see Choosing a Creditor Entity, an SCI and a Business Code).

-
The “Creditor Data” block:
If the user has chosen an SCI account, the creditor’s name is automatically filled. The user must select an account in the creditor accounts list; the default account defined above in the entity options is preselected.

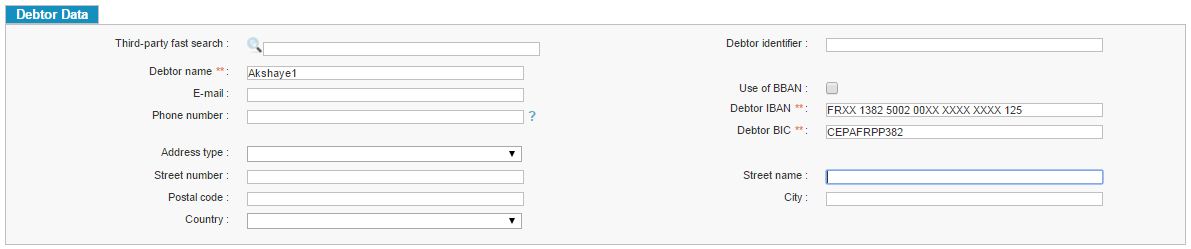
- The “Debtor Data” block:
The debtor’s personal information (name, email address, phone number, and complete physical address) and banking information must be filled in the “Debtor Data” block.
The Debtor BIC is automatically retrieved/calculated from the Debtor IBAN.
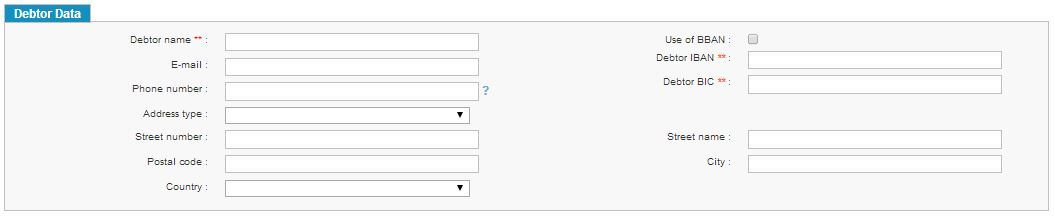
In order to correctly fill out the debtors’ banking data, it is possible to convert his BBAN by ticking the “Use BBAN” option.
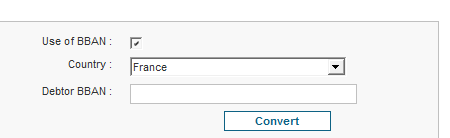
By clicking “Convert”, the BIC and IBAN fields are filled with their respective information, provided the BBAN and debtor’s country were correctly input.
-
The “UMR” option:

-
When creating a mandate, the user can choose to Input the UMR manually;
-
Let SEPA Payment Suite generate the UMR automatically. If chosen, the UMR will be computed depending on the selected pattern. While validating the mandate creation, the program will make sure that every piece of information required to generate the UMR is available. If not, an error message will inform the user.
Please note that manually inputting the UMR might not possible if the user does not have the required user rights. In that case, the UMR is automatically computed.
-
The “Mandate Data” block:
The user also has to input the Unique Internal Reference (UIR), the sequence type, and the mandate scheme. If the debtor has already filled a paper mandate form, the city and date of signature may be filled. The mandate can be uploaded as an attachment. The “Physical Storage Location” is used to save the physical location of the paper mandate.
If the signature city is filled but not the signature date, it is not possible to create the mandate.
The “Contract Info” and “Contract Description” are optional fields.
The “Mandate type” allows to choose if the user wants to create a New SEPA mandate, a Pre SEPA mandate or an Existing SEPA mandate, see §Creation of a migrated Mandate

- The “Notification Mode” block:
The user must select a notification channel for the debtor (see Notification).

For more information, please see Creating a “No Collection” Mandat, Creating a Mandate and the Electronic Mandate Delivery, Creating a Mandate and the Default Channel Delivery or Creating a Mandate to an Already Notified Debtor.
-
The “Additional Information” block:
The user can add the name and identification number of a third-party creditor and/or debtor.

- « List of Attachments »
If the debtor has completed and signed a mandate form, it must be inserted as an attachment. A physical storage key must be determined for the storage and a description of the attached file can be provided. After clicking [CHOOSE A FILE], the user can select the file he want to add. More information is provided in part 4.7.2.

Creation of a migrated Mandate/New SEPA Mandate/existing SEPA Mandate
When creating a mandate it will be possible to specify type of mandate:
- New SEPA mandate : the behavior is a classical mandate creation.

- [Pre-SEPA migrated mandate] : the specific migration rules will be applied according to the migration country before creating the mandate in the SPS system. User will have to choose the National Creditor Identifier (list dynamically displayed by selecting “Pre SEPA mandate”, containing all the NCI defined for the SCI). When validating the SDD, system will check that the SCI country equals country of debtor account.

- Existing SEPA mandate : if the user chooses Existing mandate to import an existing mandate from another system to SPS, the field “Due date of last SDD issued” is displayed dynamically, if the user don’t filled the date, current date is used by default. Thereby the first SDD issued by SPS will be set as a recurrent and not as a first. The signature date and the due date of the last SDD issued must be different.

Creation of Mandates with the same UIR
If the Organization does not authorize several mandates with the same UIR at creation (Annex 1: List of creditor parameters), a check is done on UIR for verifying that no other mandate with the same UIR already exists. Otherwise, mandate can be created according to the following rules:
-
A Mandate with this UIR does not exist: create the Mandate
-
A Mandate with this UIR exists:
-
The status of the new Mandate won’t be Active: create the Mandate
-
The status of the new Mandate will be Active:
-
An Active Mandate with same UIR does not exist: create the Mandate Active
-
An Active Mandate with same UIR exists:
-
Suspend old Active Mandate:
-
Old Active Mandate has transactions with status Generated or advanced: there are not impacted
-
Old Active Mandate has transactions with status earlier than Generated: there are updated to Pending
-
Create the new Mandate Active
-
-
-
-
Creating a “No Collection” Mandate
If the mandate form has already been sent to the creditor, sent back to the debtor for completion and received and approved by the creditor, the user must choose the “No collection” in the “Notification service” block.
Creating a Mandate and the Electronic Mandate Delivery
If the creditor wants the debtor to fill in the mandate on the internet, the “Electronic mandate” option must be selected.
An email will be sent to the debtor asking him to fill an electronic mandate on a secure website. The debtor’s information will be automatically saved into SPS. Once the mandate has been completed by the debtor, it must be printed and sent by mail.
The mandate status will be set to “Sent to debtor”. The mandate can still be modified and must be updated upon reception of the debtor’s form.
Creating a Mandate and the Default Channel Delivery
If the creditor wants the debtor to complete a paper mandate, the “Default channel” delivery option must be chosen. Depending on the default options for the organization and the debtor information available, the delivery channel will either be email or mail.
The mandate status will be set to “Sent to debtor”. The mandate can still be modified and must be updated upon reception of the debtor’s form.
Creating a Mandate to an Already Notified Debtor
Should the mandate already be delivered to the debtor, the user must select the “Already notified” delivery option.
The mandate status will be set to “Sent to debtor”. The mandate can still be modified and must be updated upon reception of the debtor’s form.
If "Automatically send reminders" of the creditor organization is active, reminders will be sent according to the parameters of the maximum number of sending and the time between two sending, and until the debtor return the completed and signed mandate.
Creating a Mandate using the Debtor Manager
If the debtor manager was activated in the parameters, it is possible to easily create a mandate by using the manager to automatically fill in some of the fields. The prefilled data cannot be modified, except for the bank account.
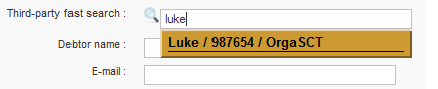
The user must click on the magnifying glass on the rights of the field to make the debtor manager come up.

Should the user add a new bank account to the mandate, the account will be saved and associated to the debtor in the base of third-party.
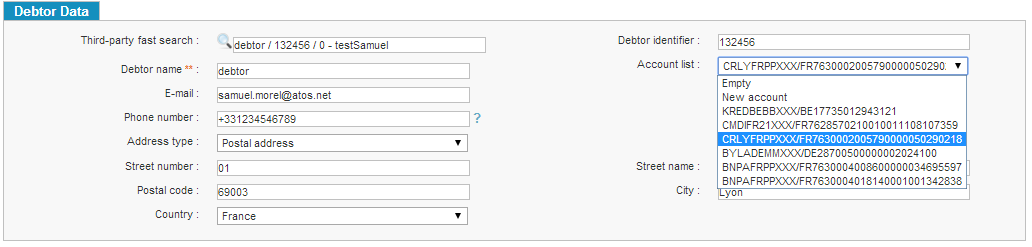
While creating/updating a mandate, if user selects the debtor using third party fast search option, a list of account for the selected third party is populated in the drop down and the default bank account is pre-selected.
If the user doesn’t want to select any account, he can leave the field blank by selecting “Empty” from the dropdown.
Creating a Mandate with a wrong Debtor account
On the mandate creation page, if the debtor account information is wrong (BIC+IBAN or BBAN), and if the option “Authorize the creation of mandates having a wrong debtor account” is activated for the selected Organization, the mandate will be created with pending status, the following message will be displayed on the top of the page: “Warning: proposed debtor account incorrect: Mandate [UMR: <umr>] created in Pending status”. The erroneous debtor account is display in RED.
If the option is not activated, the behavior is unchanged; the creation is rejected.
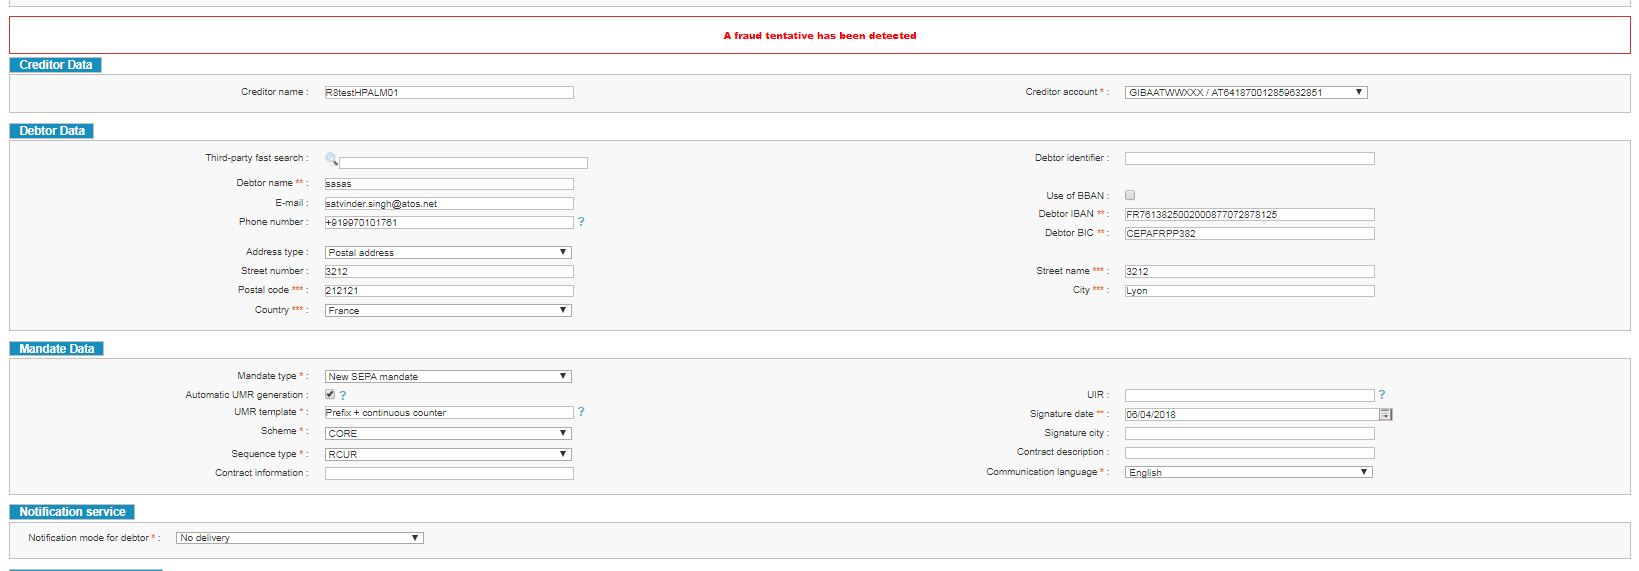
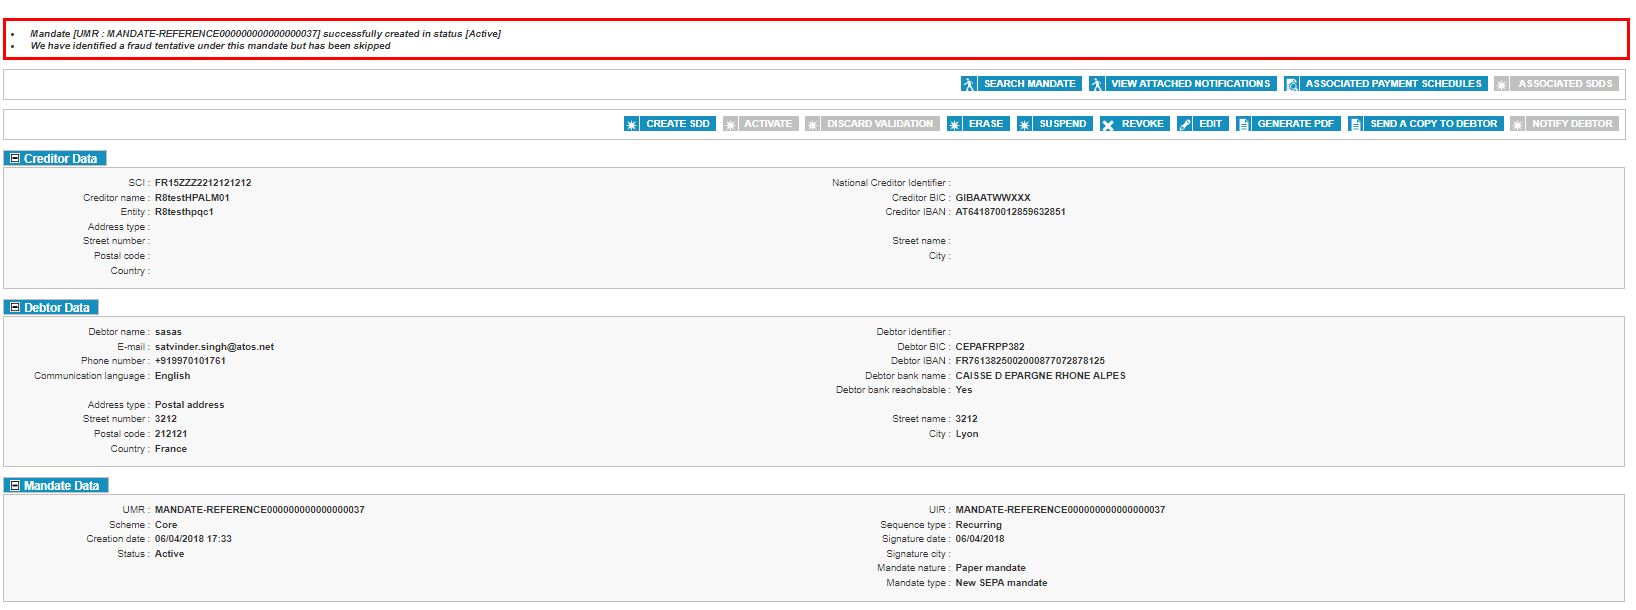
Creating a Mandate with Fraud Control
If the SPS fraud option and fraud profile active for the organization then only creating mandate comes under the fraud Control check. If fraud configuration for the web is activated and fraud decision is Red then mandate creation blocked and error message displayed but if fraud configuration is deactivated and fraud decision is red then it allows the creation of mandate
Editing a Mandate
Editing a mandate can be done using the “Edit” page from Home > Creditor > Mandates Management. By either searching for a mandate or viewing its details, the “Edit page” can be accessed by clicking on the [Edit Mandate] button.


The edit page allows changing some fields of the mandate. The structure of the edit page is similar to the mandate creation page – but some fields cannot be modified.
As for the Mandate creation page, the legend at the end of the page gives the meaning of the single asterisk and the double asterisks that can be displayed:
*: Fields mandatory
**: Fields required for activation
Editable Data
The following table lists the mandate fields that can be change according to the mandate status.
| Incomplete | Sent to debtor | Awaiting reachability | Suspended | Active | |
|---|---|---|---|---|---|
| UMR | X | X | X | X | |
| UIR | X | X | X | X | |
| Scheme | X | ||||
| Sequence type | X | ||||
| Signature date | X | X | |||
| Signature city | X | X | |||
| SCI | X | X | X | X | |
| Creditor’s bank BIC | X | X | X | X | |
| Creditor IBAN | X | X | X | X | |
| Debtor’s name | X | X | X | X | X |
| Debtor’s bank BIC | X | X | X | X | X |
| Debtor IBAN | X | X | X | X | X |
| Debtor address | X | X | X | X | X |
| Debtor’s country | X | X | X | X | X |
| Debtor email | X | X | X | X | X |
| Debtor phone number | X | X | X | X | X |
| Debtor identifier | X | X | X | X | X |
| Third-party debtor | X | X | X | X | X |
| Third-party debtor’s identifying number | X | X | X | X | X |
| Third-party creditor | X | X | X | X | |
| Third-party creditor’s identifying number | X | X | X | X | |
| Type of signature | |||||
| Type of signature agreement |
The block «signature details» containing the fields «type of signature» and «type of signature agreement» is not editable, and displayed only for mandates with a nature equals to «signature mandate».
Editing the UIR
The UIR attribute of a mandate can be modified according the following rules:
-
Another Mandate with this UIR does not exist: update Mandate
-
Another Mandate with this UIR exists:
-
The updated Mandate does not become Active: update Mandate
-
The updated Mandate will become Active:
-
An Active Mandate with same UIR does not exist: update Mandate
-
An Active Mandate with same UIR exists:
-
Suspend the other Active Mandate:
-
Other Active Mandate has transactions with status Generated or advanced: there are not impacted
-
Other Active Mandate has transactions with status earlier than Generated: there are updated to Pending
-
-
Update Mandate
-
-
-
Editing the Debtor account
If the user is not associated with the ‘View Beneficiary IBAN data’ profile, the debtor account for the mandate cannot be updated as described in the following paragraphs:
a) If the account is displayed as a text field.
b) If the third party database is activated then the ‘New account’ option is not available in the debtor account dropdown.

Attaching and Viewing a File to the Mandate
Attaching a file
A creditor user can attach a file to a mandate if needed. This file usually is a digital image of the scanned mandate or a letter informing that the debtor has moved his bank account.
While creating or updating a mandate, click on “Choose” next to the attachment field and provide an archiving key (which is the physical location of the original file). The user can put a description in the corresponding field.

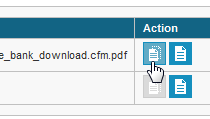
Viewing an attachment
The user can view any attached file. To do so, go to the mandate details page. Files are viewable from the "List of Attachments" table of the mandate.
An attachment file can be download singly by clicking the [DOWNLOAD] button or the user can download all the files by clicking the [DOWNLOAD ALL] button.

Planned Mandate Modification
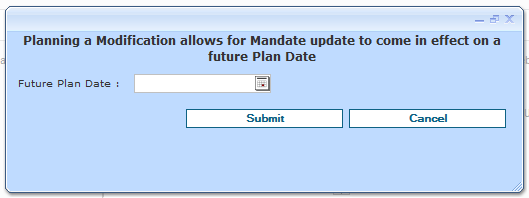
When editing a mandate, the user can decide when the modification will take place by providing a Plan Date. To do this, the user must to click on [Planned Update] instead of [Update].

Once the user clicks on the Plan Modification button, a popup appears with the brief description “Planning a Modification allows for Mandate update to come in effect on a future Plan Date”. Under the description, there is a field to Input the Plan Date for the Planned with a Submit and Cancel Button.
-
On clicking [Cancel], the Popup disappears and the Edit page remains like it was before the Plan Modification button was clicked.
-
On clicking [Submit], a validation is done if the Plan Date is entered and valid. A valid Plan Date is a date that is greater than today’s date. This means the Plan Date cannot be in the past, or be the present date.
If an invalid Plan Date is entered, an error appears in the Popup with text “The Plan Date must be greater than the Present Date”.
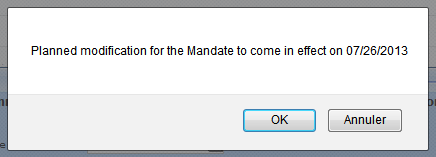
The mandate modification with future plan date is visible in the table “Planned Modification” at the end of the mandate detail page; the value in the braces indicates the number of entries in the tab.
An entry in planned modification appears also in following status change condition
-
When mandate status is changed from active to suspend/revoke status
-
When mandate status is changed from suspend/revoke to active
When the status is changed from suspend to active with effective date as today, then only single entry related to this change appears in planned modification, but when the status is changed from suspend to active with effective date as future date, then all entries related to status modification from suspend to active or vice versa appears in the planned modification table.
The tab contains the following information:
| Column name | Description |
|---|---|
| Update date | The date of Creation of the Planned Modification |
| Origin | Type of the modification: via GUI, file or Web Service |
| Operator | Login of the user who planned the modification |
| Modified attribute | All the Attributes of the Mandate that are modified |
| Original value | The original value of the respective attribute of the Mandate |
| New value | The new Value of the Attribute after Mandate will be updated |
| Future Plan Date | The date on which this modification is planned to take place |
| Status | The status of the Planned Future Modification. This status could be SUCCESSFULLY DONE, IN ERROR or PLANNED |
| Error Code | In case the status is IN ERROR, the Error code of the error will be displayed here |
| Error Message | In case the status is IN ERROR, a description of the Error will be displayed here |
| Action | A planned Future Modification can be deleted if it is in PLANNED state. No other status can be deleted |
When a planned modification is applied, a report is created and available in the file search page.
Editing a Mandate with a wrong Debtor account
When modifying a mandate, if the option “Authorize the creation of mandates having a wrong debtor account” is activated for the selected Organization, the user can filled a wrong Debtor account. The mandate will be edited and set to pending status. A warning message is displayed on top of the page to inform him that the mandate is pending and the erroneous Debtor account is displayed in RED.
Editing a mandate using the Debtor Manager
If the debtor manager was activated in the parameters, it is possible to easily update a mandate by using the manager to automatically fill in some of the fields. The prefilled data cannot be modified, except for the bank account.
While modifying a mandate, if the third party database is activated on the organization , following are the cases that can occur:
a) If the mandate is linked to the debtor of the third party database and if user tries to add new account then that account will be saved. It will also get added to third party.
b) if the external id is set for the mandate and if that external id is present in third party database then all debtor data already set for that mandate will be replaced by the third party’s data related to external id.
c) if the external id is set for the mandate and if that external id is not present in third party database then that external id will be saved on that mandate, but it will not be added to the third party database.
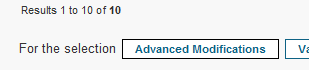
Advanced Mandate Modifications
Advanced mandate modifications are done on the “Advanced Modifications” page on Home > Creditor > Mandates Management > Advanced Modifications. The page is accessible from the mandate search page by clicking “Advanced Modifications”.
Advanced modifications allow to edit a selection of fields from one or more mandates.
Editable Data
The following table displays the information that can be modified.
| Incomplete | Awaiting validation | Awaiting reachability | Suspended | Active | Other* | |
|---|---|---|---|---|---|---|
| Creditor entity | X | X | X | X | X | X |
| Creditor’s bank account | X | X | X | X | X | |
| SCI | X | X | X | X | X | X |
| Business Code | X | X | X | X | X | |
| UMR | X | X | X | X | X |
*Other statuses are Cancelled, Final and Expired.
Choosing Modifications
The user must first search for the mandates he wishes to edit. From the results page, he then selects all the mandates to be edited: one mandate, all mandates on the page or all search results. Once all the requested mandates are ticked, the user proceeds by clicking the [Advanced Modifications[ button.
The “Advanced Modifications” page is loaded and a reminder of the number of selected mandates is displayed.
The user ticks the fields that require editing and selects a new value for every one of those fields.
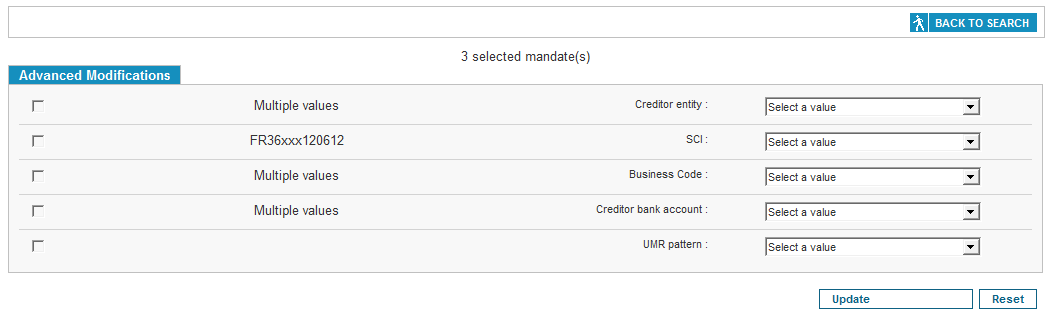
Hitting “Update” to validate the changes will display a pop-up window that summarizes the modifications.
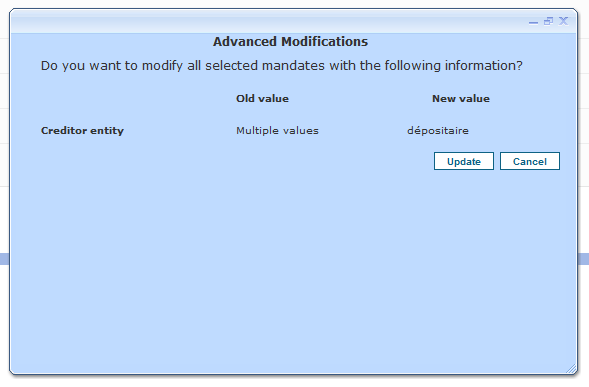
Editing the Creditor Entity

When the “Creditor entity” field is selected for modification, the user must choose an organization from the drop down list.
The organizations to be chosen are those the user has access to. If the user selects an organization that does not allow the scheme, the sequence type, the SCI, the Business Code or the bank account from one of the selected mandates, an error message will be displayed and the modifications will not be applied.
Editing the SCI

When the “SCI” field is selected for modification the user must choose an SCI from the drop down list.
The SCIs in the list are those allowed for the organization. If the user chooses an SCI that is not allowed for a sub organization and if one of the selected mandate belongs to this sub organization, an error message will appear after validation and the modifications will not be applied.
Because the uniqueness of the mandate is guaranteed by the SCI/UMR combination, the user can recompute the UMR of the mandate when its SCI is about to change. He can:
-
Choose not to recompute the UMR (an error will be displayed in case
of duplication); -
Choose an UMR pattern and re-generate:
-
Only the duplicated UMRs,
-
Every UMR.
-
If the user computes the UMR, the UMR fields will not be available for edition in the Advanced Modification page.
If the SCI is changed, the mandate’s Business Code is kept as is.
Editing the Business Code

When the “Business Code” field is selected for modification the user must choose a new Business Code from the drop down list.
The Business Codes in the list are those available for the user’s entity. If the user chooses a Business Code that is not authorized for his entity, an error message will appear after validation and no modification will be applied.
Editing the Creditor’s Bank Account

When the “Creditor’s bank account” field is selected for modification the user must choose a new account from the drop down list.
The accounts in the list are those allowed for the organization. If the user chooses an account that is not allowed for a sub organization and if one selected mandate belongs to this sub organization, an error message will appear after validation and the modifications will not be applied.
Editing the UMR

When the “UMR” field is selected for modification, the user must choose a new UMR pattern in the drop down list.
Available UMR patterns are those authorized for the user’s organization.
Preprocessing
When the user validates the changes from the confirmation popup window, a preprocessing step is launched. The process checks if the modifications are actually authorized for the user.
If errors are found, they will be listed on the page. The user will be able to:
-
Go back to the Advanced Modifications page and edit his choices;
-
Go back to the mandate search page and change his selection of mandates;
-
Change the parameters of one or more organizations.

If the preprocessing happened without errors, the user can proceed and validate the changes.

Processing
The user is then taken to a page that displays the progress of the mandate modification.
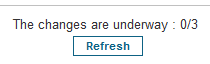
The refresh button allows the user to be informed on the processing progress. A message is displayed when the processing is complete.
Generating Custom Mandate Forms
The user can generate custom mandate forms to be sent to the creditor and/or the debtor to create a new SEPA mandate once the form has be completed.
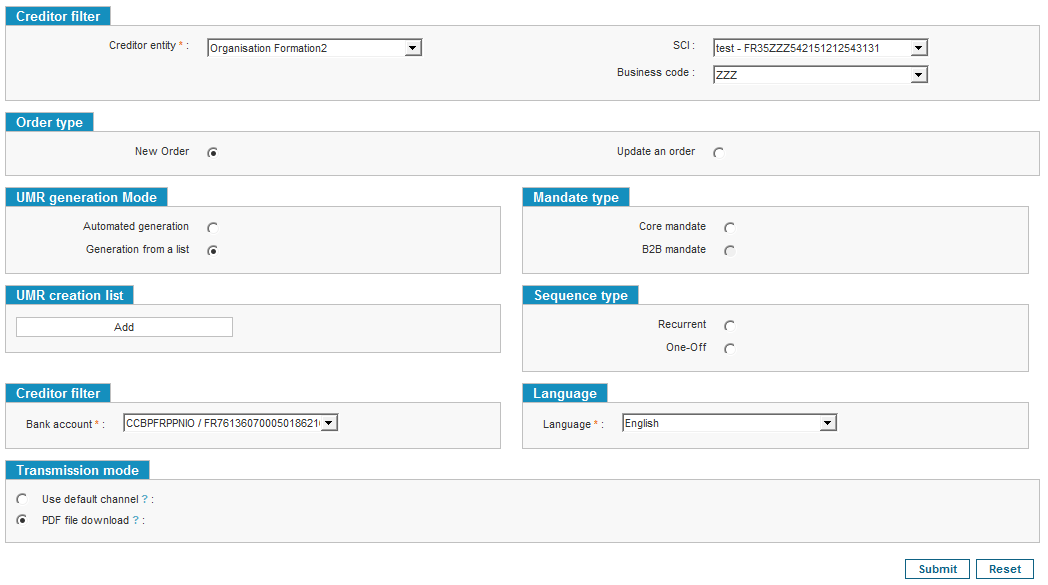
The user first selects the creditor entity, the SCI account and the Business Code in the “Creditor filter” block (see Choosing a Creditor Entity, an SCI and a Business Code).
In the “Order type” block, the user chooses if the mandate matches a new order or updates a previous one. Depending on the order type selected, the creation process may vary.

New Order
The user is about to generate a mandate creation form.
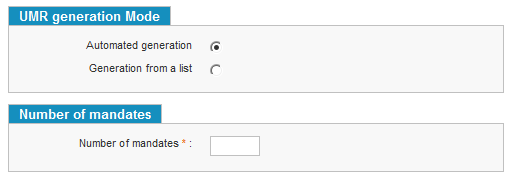
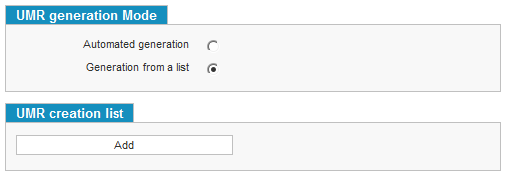
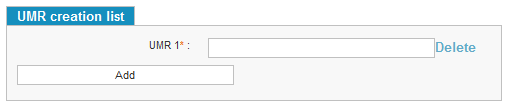
The UMR generation block appears. If the user chooses to manually generate an UMR by ticking “Generation from a list”, he must input the UMRs in the block that appeared below. If the user chooses to generate an UMR automatically, the “Number of mandates” block appears to help create new UMRs.
The “mandate type” is used to specify the mandate scheme (Core or B2B).
The’‘sequence type’’ is used to define if the mandate is recurring or not.

The “Creditor filter” block is used to choose the SCI’s bank account.
The “language” parameter is used to determine the language of the generated form.

The last block, “Transmission Block”, allow the form to be delivered either:
-
By downloading it from the GUI after the forms have been generated;
-
By sending it through the default channel. SEPA Payment Suite will deliver the forms using the preferred delivery method (mail/email) as well as a predefined notification message.

Once the required information has been input, the user must hit [Submit]. Depending on the delivery mode, the form is either automatically downloaded by the user or sent through the default channel. The user can also hit [Reset] to reset all fields to their default values.
Updating an Order
If the user wishes to update an order, a block will allows him to select the ID (generated by the tool) of the order to be updated.
Please note that only orders sent by postal mail can be edited.

In another block, the user must input a list of UMRs.
Once those two steps are completed, the user hits [Submit] to finish the process. Hitting [Reset] sets all fields back to their default values.