The FCC module is a Sepa Payment Suite functionality that allows clients to quickly create several organizations, users, or creditors on SPS-Signature through the use of templates. It can also be used to import certificates on SPS-Signature creditors, or to create a file transfer connection.
Please keep in mind that the templates used all throughout the FCC user guide, are to be created in collaboration with your point of contact on eWL’s side.
As well, make sure that the account you will log with, in order to use the FCC module, has to be duly habilitated. To that effect, the necessary User Group habilitation is “Fast Creditor Creation: Access to the FCC creation module”. If you cannot yourself grant this role to a user, then you have to ask it to your eWL’s point of contact.
FCC organization creation
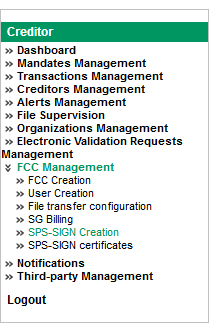
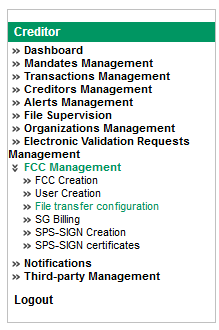
When logging into the GUI, first choose the FCC Management in the Creditor menu:
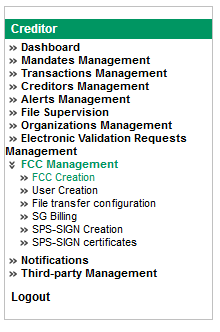
For organization creation, the user should choose the FCC Creation:
The above page appears, with several blocks :
-
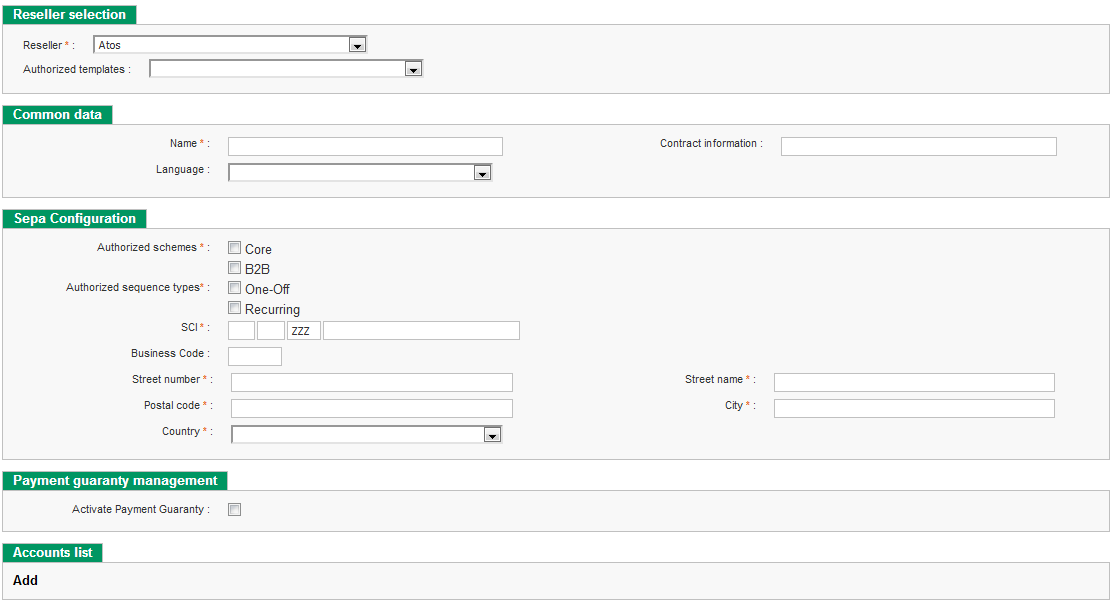
Reseller selection : every template used for fast creditor creation should be linked to the relevant reseller. Once the reseller is chosen, the authorized templates on said reseller are displayed. Templates are XML files that define the settings that are to be configured for the organization we are creating.
-
Common data : once the template is chosen on the dropdown list, the name of the organization should be entered. One can also select the preferred language and enter contract information.
-
Sepa Configuration : This block allows the selection of several settings for the organization to create. Authorized schemes (Core, B2B), Authorized sequence types (One-Off, Recurring), SCI, Business Code, and the Postal address can thus be configured.
-
Payment Guaranty management : To be selected in order to activate the payment guarantee option on the soon to be created organization.
-
Account list : It is mandatory to add at least one bank account to the organization you are creating. It is possible to add several other accounts to the account list.
Once all the mandatory information is entered, you can submit your Fast creditor creation at the bottom of the screen.
In the creditor menu, the following path : Organizations Management -> Display Organization allows you to visualize the organization that has just been created.
FCC User creation
First follow the path below on SPS the Creditor menu :
FCC management -> User Creation:
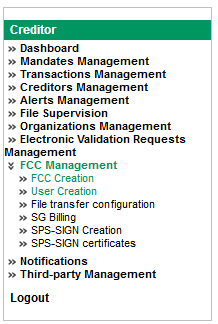
The following page is displayed :

Select the organization you want to create users on, in “Organization selection” block, then click add new user in the “User information” block. Further details are displayed when adding a new user :
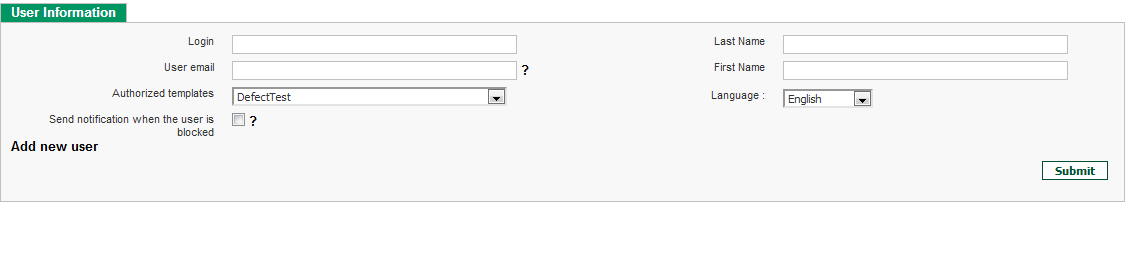
A user template is needed in order to create a user, the template will define all the settings and rights that you want to assign to the newly created user.
Select the right template, then enter Login, user email, first and last name, preferred language, and whether or not a notification is to be sent if the user is blocked.
Once this step is completed, submit your user creation.
(Note: in this step, you can create as many users as you want with the same template by clicking “Add new user”, and then submit the creation of all these users at the end.)
In order to verify the user’s correct creation, login with a security user on SPS creditor, then select the following path:
User management -> User search, and enter the login of the user you created.
The user should be displayed in the users list, on the previously selected organization, see example below :

FCC SPS-SIGN creation
First, select the following path:
FCC management -> SPS-SIGN creation
The following page is displayed, in order to select a reseller from the dropdown list:

Once the reseller is selected, several setting blocks are displayed and must be configured :
-
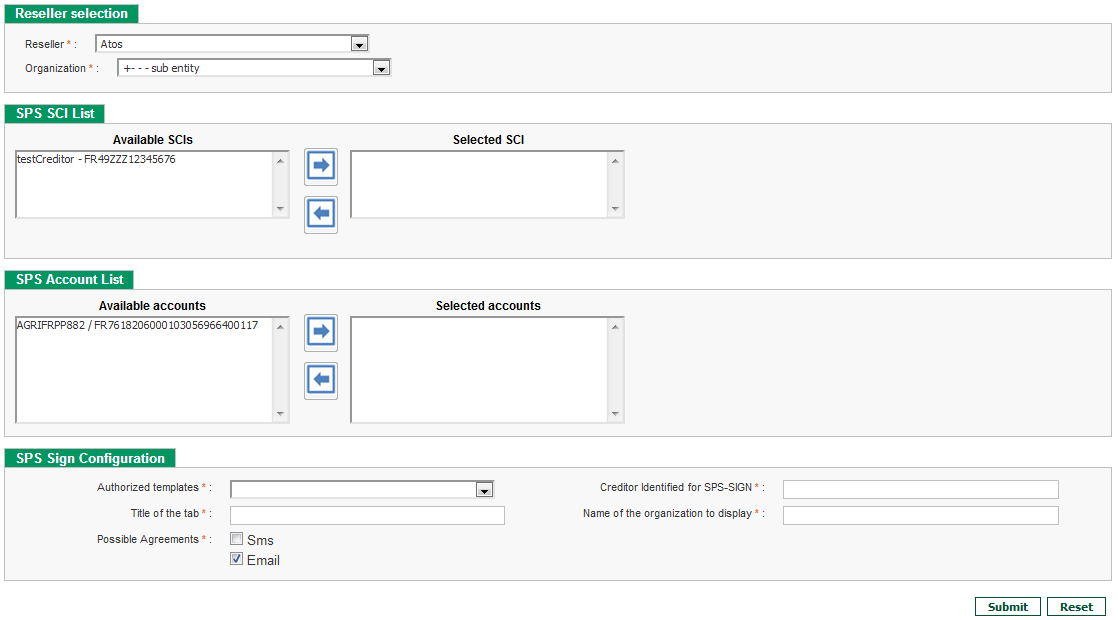
Reseller selection : as the reseller has already been selected, an organization linked to that same reseller should be chosen from the dropdown list.
-
SPS SCI list : An SCI should be selected for the SPS-SIGN creditor.
-
SPS Account list : Accounts are to be selected for the SPS-SIGN creditor to be created.
-
SPS Sign Configuration : The authorized templates should be selected from the ones available in the dropdown list. TheCreditor Identifier and name of the organization should be entered, along with the Title of the tab displayed in the web browser, and the possible agreements (either by Email or SMS).
Once this step is completed, submit you creditor creation.
FCC SPS-SIGN certificates
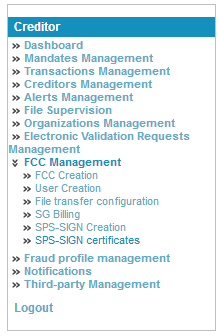
You should be connected as a reseller to have access to this feature. First, follow the path below:
FCC management -> SPS-SIGN certificates
The following page is displayed, in order to select the reseller and root organization from the dropdown list, along with the SPS-SIGN creditor :

Once a SPS-Signature creditor is selected, the list of public certificates hosted on the SPS-Signature service and associated to this SPS-Signature creditor :
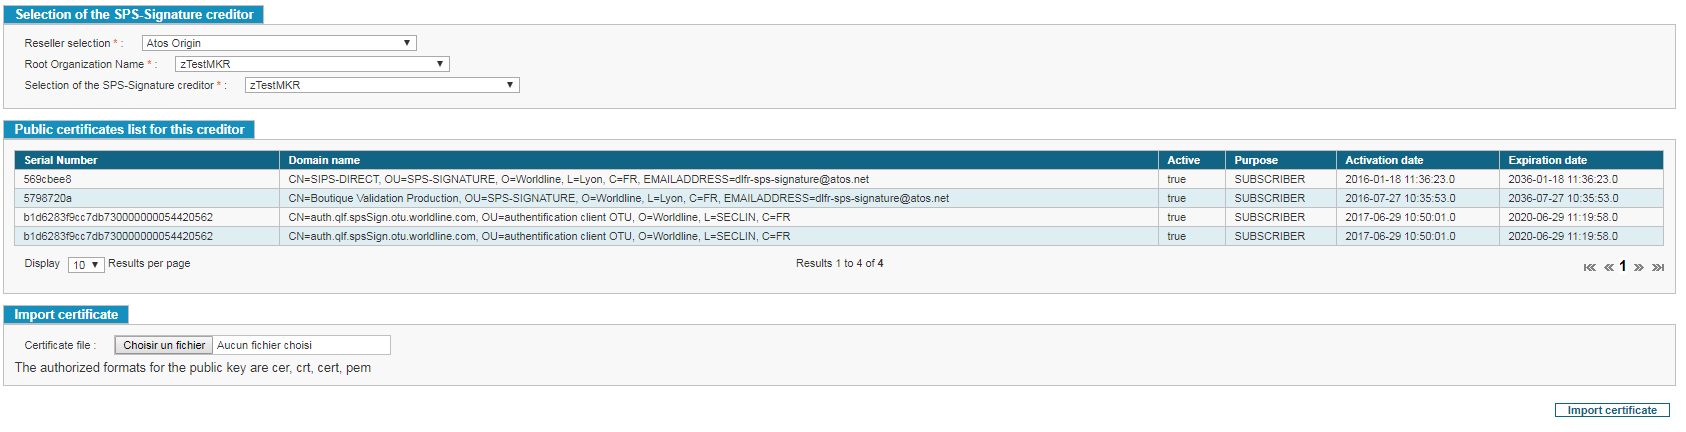
For each certificate, the following information is displayed: Serial number, domain name, whether the certificate is active or not, purpose that is always set on the “Subscriber” value, activation and expiration dates.
You can then import the certificate you want to associate with the selected SPS-SIGN creditor in the ‘Import certificate’ block. The certificate will not be imported and an error message will be displayed if the certificate is not valid of if it is already associated to the creditor.
FCC File Transfer configuration
First, select the following path on the creditor menu:
FCC management -> File Transfer Configuration
The following page is displayed, in order to select the right organization you want to create a file transfer connection on :

Once the organization is selected, you can add a file transfer in the “File Transfer Configuration Block” :

Select the template that is to be used, the Pattern for file naming and the path on remote server. The Pattern is not a mandatory field.
You should also select the type of the File Transfer (whether the transiting files are to be renamed or not). If the selected type is “Simple”, then no renaming is needed. If the selected type is “Rename”, then you should enter a file renaming parameter. Check the “Active” box if you want to activate the File Transfer you are creating, and then submit the creation.