General Description
Before the user gives his approval, a mandate has to be created. And in order to create one, one side (signer or creditor) need to provide information.
There are 2 possibilities: the creditor can supply signer information via web service fields using his client data base for instance; the signer gives his information via step 1 as shown in the following part.
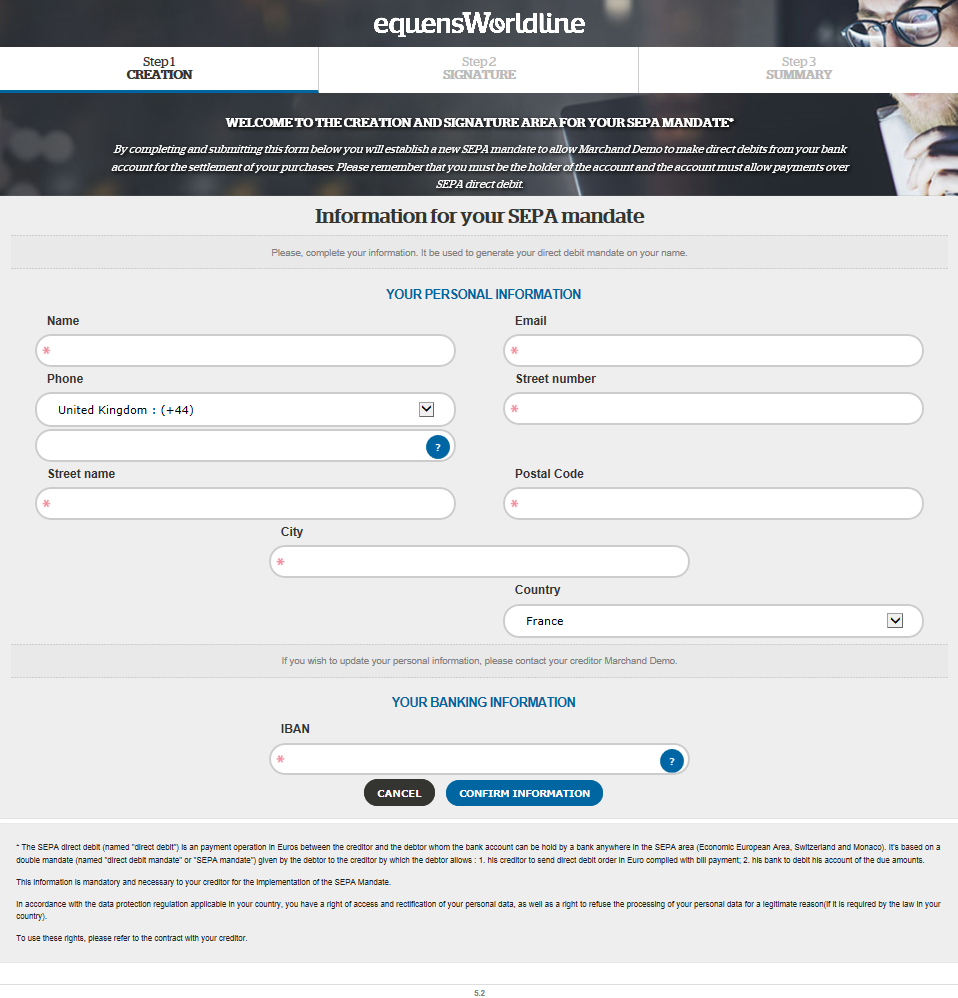
Figure 1: Step 1 Empty page
Process tracker – step 1

Figure 2 : Signature process tracker – step 1
This section of the page offers the user a view of the signature process.
Each part is highlighted during the presence of the user on that step.
Welcome message and legal statements

Figure 3 : Welcome message and legal statements
This section greets you with a welcome message that is the same one for all the creditors.
“Signature Recette” is the name of the creditor configured in SPS Signature.
SEPA Mandate Information
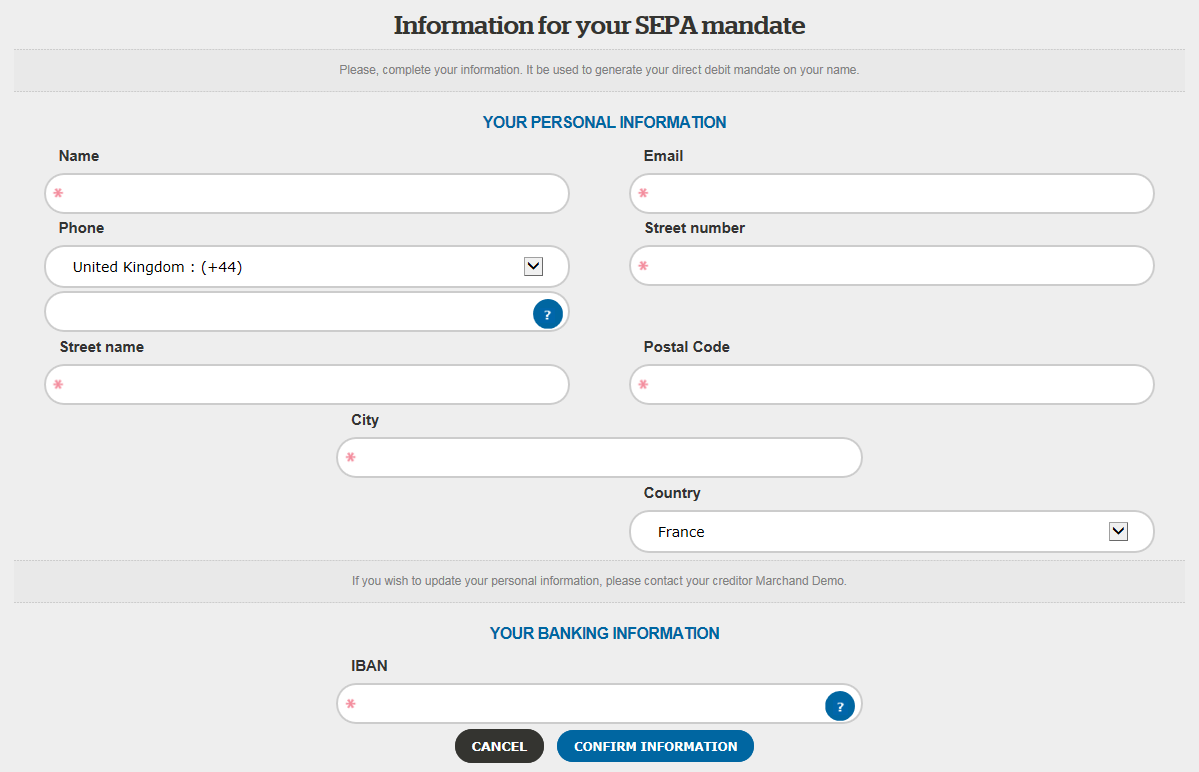
Figure 4 : SEPA Mandate information
This form lets the user fill in his information:
- Name : a text field (example : John Doe)
- Email : a text field to enter a valid email format (example : john.doe@worldline.com)
- Phone : a dropdown menu to select the country calling code, and a text field to enter the rest of the number (example : France : (+33) 612345678)
- Street number : a text field to enter a street number
- Postal Code : a text field to enter a postal code
- City : a text field to enter a city
- Country : a dropdown menu to enter a country
- IBAN : a valid IBAN (example : FR1420041010050500013M02606)
Note that this information can be partially entered by the creditor, and remain unmodified by the signer.
The following table shows which debtor fields are required to complete step 1, for all agreement schemes.
M : Mandatory, O : Optionnal.
(*) : If the creditor option : “Debtor Email Required on Step 1 for all
agreements?”, the email of the debtor becomes mandatory for all agreement
schemes.
| Field | Agreement Scheme | SMS | Pentablet | SIPS Payment | SIPS Authorization | |
|---|---|---|---|---|---|---|
| Name | M | M | M | M | M | M |
| M | O(*) | O(*) | O(*) | O(*) | O(*) | |
| Phone | O | M | O | O | O | O |
| Street number | M | M | M | M | M | M |
| Street name | M | M | M | M | M | M |
| Postal Code | M | M | M | M | M | M |
| City | M | M | M | M | M | M |
| Country | M | M | M | M | M | M |
| IBAN | M | M | M | M | M | M |
OTU information requirements
The difference between ORG and OTU is covered in the introduction.
When making the web service call to initialize a session of signature for the
customer, the creditor has to provide minimal but mandatory identity information
for the signature to occur:
- LastName
- FirstName
- Gender
Other information can be provided by the signer himself. Typically SPS customer
require their client to provide only his IBAN if all the personal mandatory info
is already stored in their database.
Legal Statements and Version


Figure 5 : Legal Statements and version number
This section, called the footer of the page, gathers two types of information : legal statements regarding SEPA, Worldline, and the version number of SPS Signature.
Actions
Security Pictogram
A security pictogram is available in order make user more confident about the security of the site. The image is visible only if, the creditor has allowed to display the security pictogram.
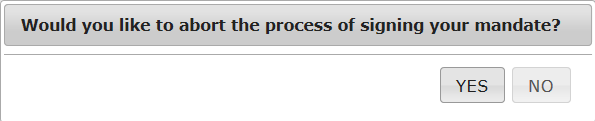
Cancel Button
This button,  is available to the user at all times to allow him to cancel his signing session, which has the effect of revoking the mandate once it is created in the
next steps. It makes this confirmation popup appear :
Confirm
This button,  allows the user to confirm the information that was entered by / displayed to him. This leads the user to Step 2 of the Signature process. Once the user
clicks this button, SPS Signature performs all validation operations and creates the mandate in a pending status before its signature.
Validations
Phone Number – Google API
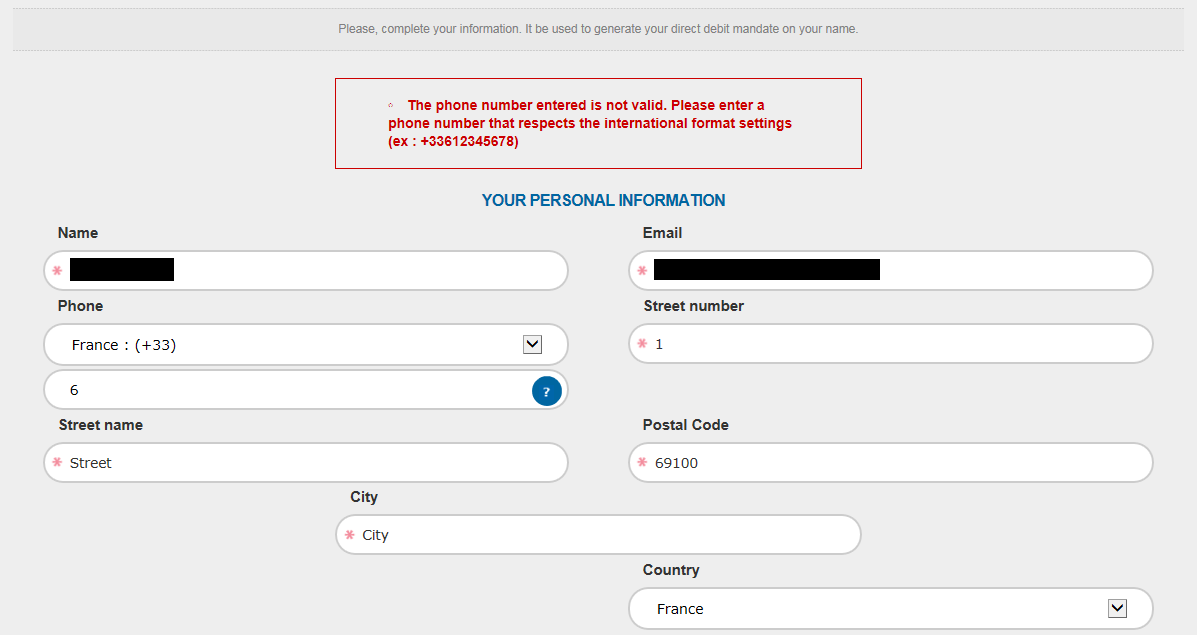
Figure 6: Validations of Phone Number
Phone number data validation is performed using Google API to check the validity
of its format : the +COUNTRY CODE NUMBER_REST OF THE NUMBER.
French users from overseas regions have to scroll down to the bottom of the list
to find their own phone code.
Email – Domain check
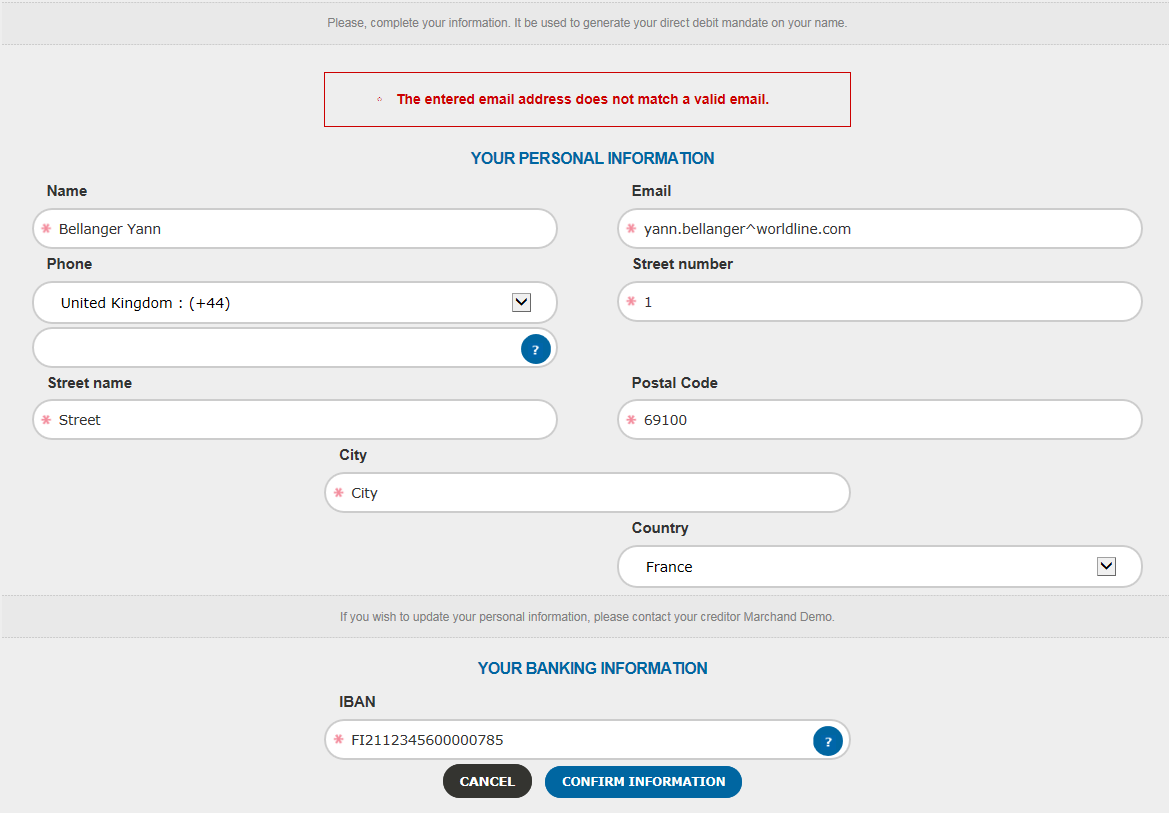
Figure 7: Email Validation
Email validation is performed by checking a list of authorized domains, pattern
validation (with @domain).
IBAN – Reachability and SWIFT
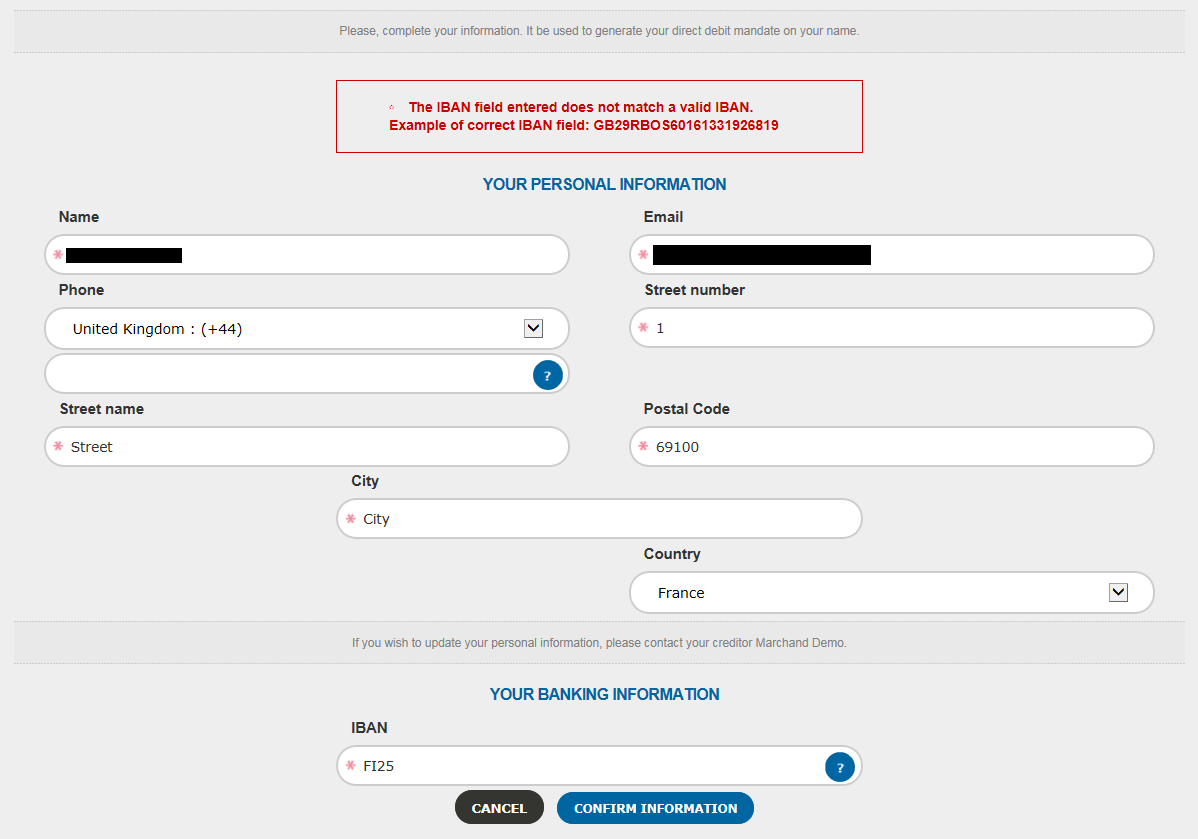
Figure 8: IBAN Validation
Since 2017, BIC codes have become optional, SPS Signature calculates the BIC from the IBAN.
To validate the IBAN, SPS Signature uses SWIFT Database to determine the reachability of the account (if it exists, if there is a way for the creditor account to access the debtor account via bank routing, if performing SEPA payments operations is possible for that bank/account). SWIFT gives its answer and we are able to let the user pursue to step 2.