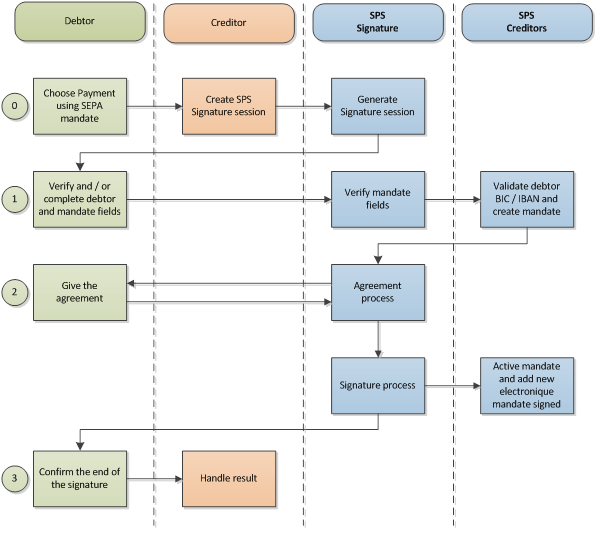
The general workflow of the Worldline electronic process is designed to be efficient and convenient. The electronic solution can be integrated in a simple payment workflow as a specific payment method. Debtor who chooses to pay using a mandate will then be redirected to the WL solution and will return to the creditor’s site once the process is complete. This document gives the reader an overview of the solution and the steps that the debtor will go through during the electronic process. Specific details about each type of authentication scheme will be covered in the next chapter.
It should be also noted that in this outline it is assumed that the debtor has not made any mistakes or errors during the process. A specific section (Error cases) will go over the mistakes a debtor can encounter.
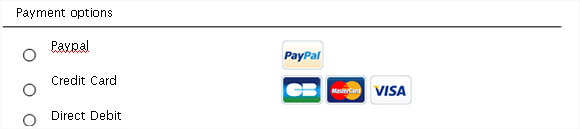
Debtor chooses SEPA Direct Debit as a Payment Option
“STEP n°0: direct debit payment”
Creditors are able to offer SEPA Direct Debits as a payment option. In order to allow this type of payment, creditors have to configure their current type of payment page by adding an additional option that provides the debtor access to SEPA mandates.
Selecting the direct debit option sends the debtor to a waiting page. At this moment, the creditor’s backend is initializing a signature session. This means that the creditor is connected through a secured web service call (SSL bi-certificate), allowing the exchange of information with the SPS Signature Platform. The creditor sends several parameters in this call depending of the required workflow and its global configuration.
If the debtor bank account is passed, the BIC/IBAN fields (transformed in Bank Account and Country of the bank if a BBAN is provided) are filled with the provided data. The validity check (consistency BIC/IBAN and reachability) is performed at the webservice call.
Once the electronic session is initialized the SPS initialization module returns a Secure URL with encrypted parameters where the debtor should be redirected.
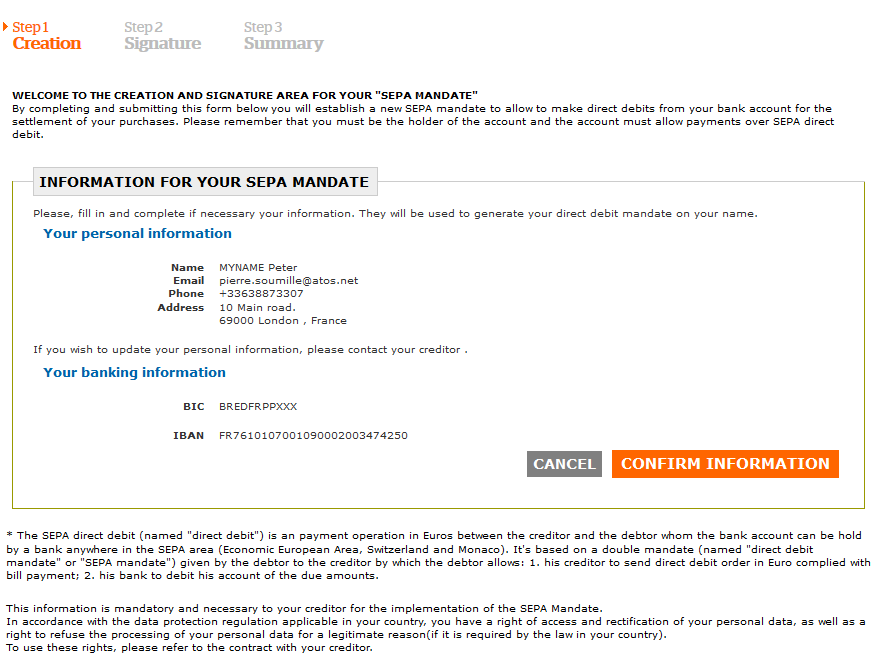
Debtor verifies / completes his own data
“STEP n°1: Creation”
After the debtor is redirected, there are different steps (depending of the creditor account configuration and the agreement scheme) for the debtor to give his consent and sign the mandate.
At this step, the debtor can verify and/or add and/or modify his own data like his name, address, mail, phone and account).
If the debtor quits or decides to return to the payment options, the electronic sessions and evidence is discarded.
When the debtor submits the form:
- A mandate is initialized and a PDF file is generated with the given information submitted. This document will be displayed in the next step and it can be downloaded but it does not count as an active mandate until it has been signed/validated.
- In SPS Creditor services, the mandate will then be created and available as a mandate with a current status: “pending”.
- The mandate’s UMR will either be provided in the request parameters or generated by SPS Creditor Services using the creditor’s rules.
Once the form has been filled with the correct data and the PDF document of the mandate is generated, the debtor has to validate his data.
Debtor verifies mandate and gives agreement
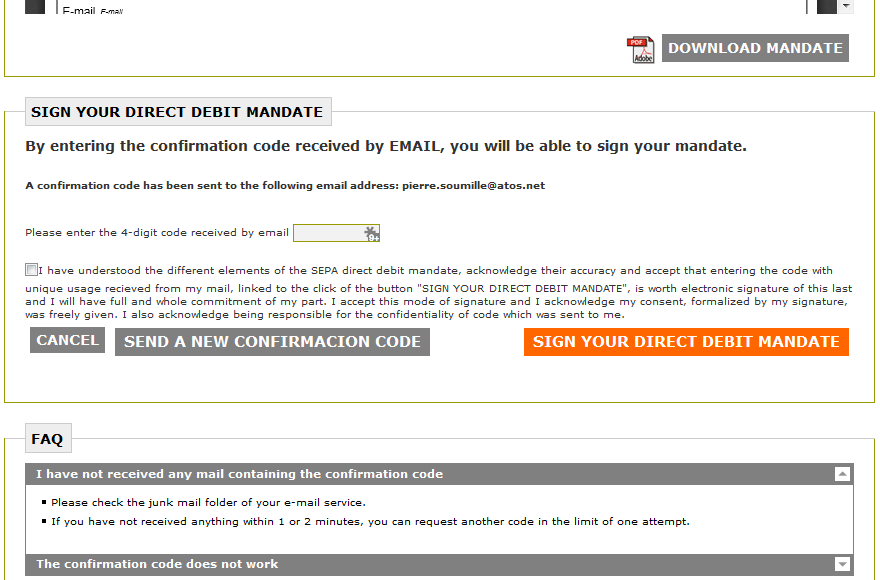
“STEP n°2: Signature-Agreement”
At this step, the PDF mandate and the agreement frames are displayed.
To ensure the debtor’s consent to sign the mandate, 3 scenarios are proposed by the SPS Signature module.
The creditor can choose one or many of these scenarios depending on the kind of debtor which will sign or validate the mandate:
- Agreement using OTP over SMS;
- Agreement using OTP over EMAIL;
- Agreement using a credit card authentication;
- Agreement using a WACOM tablet.
In the agreement switch mode, and if the creditor parameter is set to TRUE, the user can change only one time his phone number or his email address. The new data filled in is stored in tracer and a new OTP is sent. It’s not possible to change from a channel to another one (for example to change SMS channel to Email channel).
The different processes regarding to agreement mode chosen are described in the next chapters.
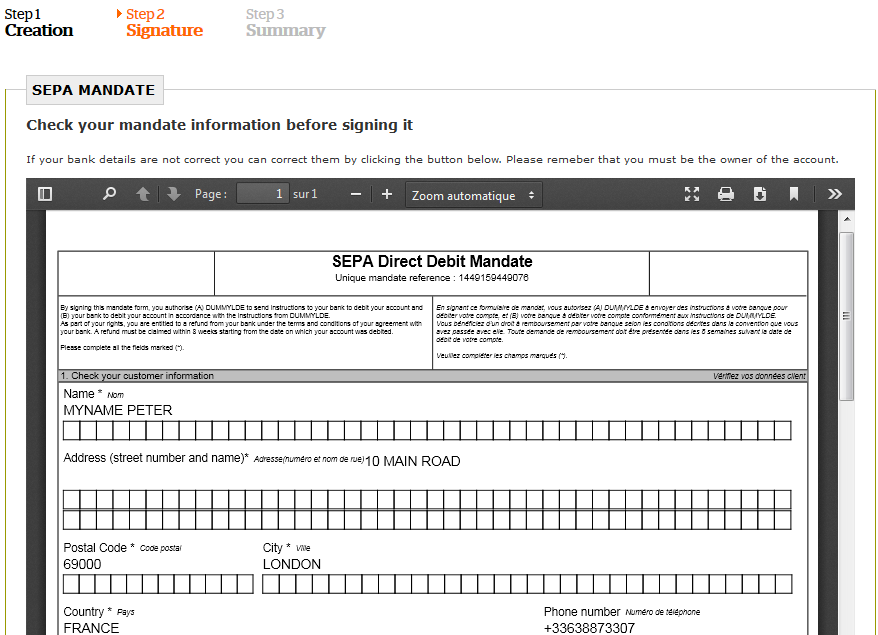
If the debtor wants to make modifications, he goes back to the Creation page and can generate a new PDF document.
If the debtor agrees with the mandate, he fills in the OTP code or performs
the first card payment to provide his agreement on the displayed mandate.
Debtor confirms the end of the signature
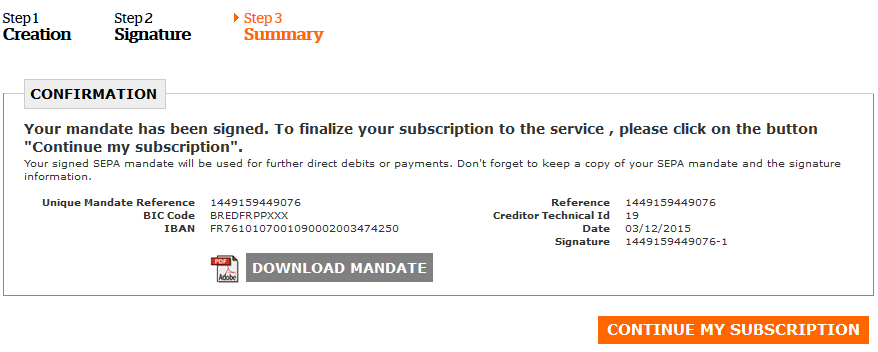
“STEP n°3: Summary”
Back End Process:
The generated PDF is signed with a certificate (OTU for a personal signature, Organization for a validation). The signature is then embedded both in a metafile and as a text in the signature box.
The mandate and the signed PDF are available on SPS Creditor Services as a valid and active mandate. If a payment schedule was requested it is also added to SPS.
The signed mandate is sent to the debtor by email if the feature is enabled.
Signed Mandate Summary:
At this final step, it is showing the signed mandate in PDF format and confirms that the process is done. The debtor can now download the mandate and save it on his computer.
A message also invites the debtor to click on a redirect link to go back to the creditor site.
If the creditor system has initiated the session with the parameter “SkipSummaryPage” to TRUE, this last page is skipped and the redirection to the creditor website is automatic.
The creditor has the responsibility to present the signed mandate, or to send it by email immediately after the return on his website. It’s a legal case. That’s why, this option to skip the summary page have to be explicitly present to the init session request for tracing the creditor responsibility and wish to skip. In addition, on the GUI, the “Step3:Summary” title doesn’t appear.